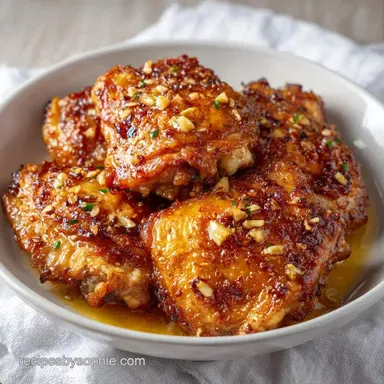
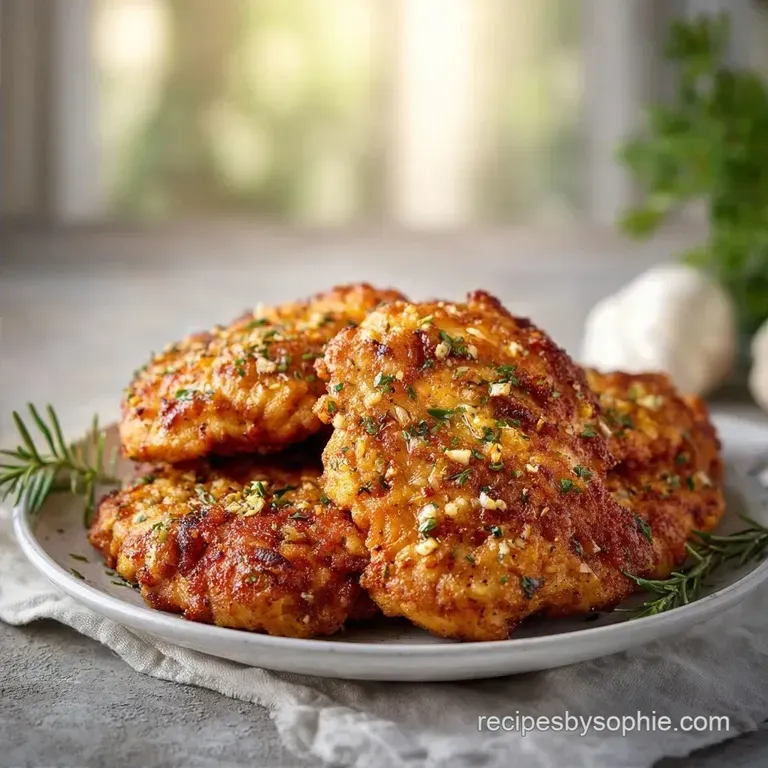
Crispy Garlic Chicken Thighs: Pan-Seared and Juicy
- Time: 10 min active + 30 min cooking
- Flavor/Texture Hook: Mahogany brown skin with a velvety garlic butter finish
- Perfect for: A budget-friendly weeknight dinner that feels like a treat
The smell of garlic hitting foaming butter is, in my opinion, the best scent in any kitchen. It's that specific moment when the aroma shifts from raw and sharp to nutty and sweet. I used to struggle with skin that stayed rubbery no matter how long I cooked it, which is a total buzzkill when you're craving that crunch.
The real hero here is the bone in, skin on thigh. I chose these because they're usually the cheapest cut at the store, but they hold onto moisture way better than breasts. If you use boneless, you lose that structural support and some of the depth, and the skin just doesn't react the same way to the heat.
Expect a dish that's salty, savory, and brightened up by a hit of lemon at the end. These Crispy Garlic Chicken Thighs don't need fancy plating to impress, just a cast iron skillet and a little patience while the skin browns.
Making Crispy Garlic Chicken Thighs
The goal here is a specific contrast: a skin that shatters like a cracker and meat that stays juicy. Most people rush the sear, but that's where the magic happens. If you move the chicken too early, it sticks and tears, leaving you with a patchy mess instead of a gold brown crust.
I've found that using a heavy skillet is the only way to get consistent heat across all six thighs. When the fat renders out, it basically fries the skin in its own juices, which is why the result is so rich. This recipe is about working with the fat, not fighting it.
Since we're keeping things budget smart, we're using a few pantry staples like smoked paprika to add a deep, woody color that mimics a grill. It's a simple way to make a cheap cut of meat taste like it cost twenty bucks a plate.
The Secret to Better Skin
Surface Dryness: Water is the enemy of browning. Patting the skin dry prevents the chicken from steaming in the pan, which is what causes that rubbery texture.
Fat Rendering: Starting skin side down allows the subcutaneous fat to melt. This liquid fat then acts as the cooking medium, frying the skin from the bottom up.
Thermal Mass: A cast iron skillet holds heat better than stainless steel or non stick. This means when you drop the cold meat in, the pan temperature doesn't plummet, keeping the sizzle constant.
Butter Basting: Adding butter and garlic at the end prevents the garlic from burning. Spooning the hot fat over the skin adds a layer of flavor and helps brown any spots the pan missed.
| Feature | Fresh Garlic Method | Jarred Garlic Shortcut | Impact |
|---|---|---|---|
| Flavor Profile | Sharp, pungent, sweet | Flat, acidic, metallic | Fresh is significantly more aromatic |
| Browning | Browns slowly and evenly | Burns quickly due to citric acid | Jarred garlic can turn bitter in seconds |
| Cost | Very low (bulbs) | Slightly higher (jar) | Fresh is the budget friendly win |
Key Ingredient Details
| Ingredient | Science Role | Pro Secret |
|---|---|---|
| Bone in Thighs | Fat reservoir | Keep the bone in for better flavor and moisture |
| Smoked Paprika | Color catalyst | Adds a "charred" look without a grill |
| Unsalted Butter | Flavor carrier | Use unsalted so you can control the seasoning |
| Lemon Juice | Acidity balance | Cuts through the heavy fat of the skin |
The Building Blocks
For the seasoning, I keep it simple. We want the garlic and the chicken's own flavor to lead.
- 6 bone in, skin on chicken thighs (approx. 3 lbs)
- 1 tsp salt Why this? Essential for drawing out moisture from the skin
- 1/2 tsp black pepper
- 1 tsp smoked paprika Why this? Gives a mahogany color and subtle earthiness
- 4 tbsp unsalted butter Why this? High fat content for a velvety baste
- 6 cloves garlic, minced Why this? Fresh cloves have a more complex sweetness
- 1 tbsp fresh lemon juice
- 1 tbsp fresh parsley, finely chopped
If you're out of smoked paprika, regular paprika works, but you'll lose that campfire note. For the butter, if you're watching your budget, any unsalted butter is fine; you don't need the expensive European stuff here.
| Original Ingredient | Substitute | Why It Works |
|---|---|---|
| Unsalted Butter | Ghee (Clarified Butter) | Higher smoke point. Note: Less milky flavor than butter |
| Fresh Lemon Juice | Apple Cider Vinegar | Similar acidity. Note: Slightly more fermented taste |
| Smoked Paprika | Sweet Paprika | Similar color. Note: Lacks the smoky depth |
The Right Gear
You really want a 12 inch cast iron skillet. According to Serious Eats, the heat retention of cast iron is what allows for a professional grade sear at home. If you only have a non stick pan, you can use it, but you won't get that same depth of brown on the skin.
I also recommend an instant read thermometer. Guessing when chicken is done is how you end up with dry meat or, worse, undercooked chicken. A few bucks for a digital probe saves you from the "cut and peek" method that lets all the juices escape.
Tongs are a must. Don't use a fork to flip the meat, as poking holes in the skin lets the juices run out. Use tongs to press the skin firmly against the hot metal during the first few minutes.
Step by step Cooking

- Pat the chicken thighs thoroughly dry with paper towels. Note: This is the most important step for the crunch.
- In a small bowl, mix the salt, pepper, and paprika, then season the thighs generously on all sides.
- Preheat the oven to 400°F (200°C).
- Place a 12 inch cast iron skillet over medium high heat until the surface is shimmering.
- Place chicken thighs skin side down in the skillet. Press down slightly with tongs and sear for 5–7 minutes until the skin is mahogany colored and releases easily.
- Reduce heat to medium. Add the butter and minced garlic to the gaps between the chicken.
- Spoon the foaming butter over the skin for 1 minute until the garlic is fragrant and golden.
- Transfer the entire skillet into the oven.
- Bake for 15–20 minutes until an instant read thermometer hits 165°F (74°C) in the thickest part of the thigh.
- Remove from the oven, drizzle with fresh lemon juice, and garnish with chopped parsley.
Solving Common Issues
The most common complaint I hear is about the skin. If it's not shattering, it's usually because the pan wasn't hot enough or the chicken was too wet. You should hear a loud, aggressive sizzle the second the meat hits the pan. If it's a quiet hiss, take the chicken out and get the pan hotter.
Another issue is the garlic. Because we're adding it after the initial sear, it should be fine, but if you add it too early, it will burn and taste bitter. The butter acts as a buffer, protecting the garlic from the direct heat of the cast iron.
| Problem | Root Cause | Solution |
|---|---|---|
| Rubbery skin | Excess surface moisture | Use more paper towels to pat bone dry |
| Bitter garlic | Added too early/too much heat | Reduce heat to medium before adding butter |
| Meat is dry | Overcooked in oven | Use a thermometer; pull at 165°F |
Common Mistakes Checklist
- ✓ Skin is completely dry before seasoning.
- ✓ Pan is shimmering hot before adding chicken.
- ✓ Thighs aren't crowded (leave a little space).
- ✓ Butter and garlic added only after the sear.
- ✓ Internal temperature checked with a probe.
Quick Swaps and Ideas
If you're cooking for a crowd, you can double this recipe, but don't try to fit 12 thighs in one skillet. They'll crowd each other, the temperature will drop, and you'll end up steaming the meat instead of searing it. Work in batches or use two pans.
For those who want a different vibe, try swapping the smoked paprika for a bit of cumin and chili powder for a Southwestern twist. If you're short on time, my boneless garlic chicken is a faster bet since you skip the long oven finish.
If you're making a smaller portion, say two thighs, reduce the butter to 2 tablespoons. You still need enough to baste, but too much butter in a small pan can lead to the chicken "boiling" in fat rather than roasting.
Kitchen Myths
Searing meat does not "seal in the juices." This is a common belief, but moisture loss happens regardless of how you start the cook. The sear is actually about the Maillard reaction, which creates those brown, savory flavors that make the meat taste better.
Another myth is that you need to let chicken reach room temperature for an hour before cooking. While a few minutes helps, the difference in the final internal temp is negligible for thighs. Just don't leave them out for too long for safety reasons.
Storage and Scraps
Store any leftovers in an airtight container in the fridge for up to 4 days. To reheat, avoid the microwave if you can; it will turn that crispy skin into a soggy sponge. Instead, pop them back in a 350°F (180°C) oven for 10 minutes or use an air fryer at 375°F for 5 minutes to bring back the crunch.
Don't throw away the bones! Once you've eaten the meat, toss the bones into a pot with some water, an onion, and a carrot. Simmer them for a few hours to make a rich chicken stock. Since these thighs were seared and roasted, the resulting stock will have a much deeper, caramelized flavor than one made from raw bones.
Serving Suggestions
These Crispy Garlic Chicken Thighs are pretty heavy on the rich, buttery side, so you need something bright to balance them. I love serving them with a side of roasted asparagus or a simple arugula salad with a lemon vinaigrette.
For a more comforting meal, you can serve them over mashed potatoes. For a richer experience, pour some creamy garlic sauce over the top, though be careful not to cover the skin, or you'll lose that hard won crispiness. A side of steamed broccoli or sautéed spinach also works wonders to cut through the fat.
Recipe FAQs
What's the secret to crispy chicken thighs?
Pat the skin thoroughly dry with paper towels. Moisture creates steam that prevents a mahogany sear. If you enjoyed mastering the sear here, see how the same principle works in our garlic chicken breast.
How to cook a garlic butter chicken recipe?
Sear skin-on thighs in a cast iron skillet at 400°F. Cook skin side down for 5-7 minutes, add butter and minced garlic, then bake for 15-20 minutes until the internal temperature hits 165°F.
Are chicken thighs good for cholesterol?
No, they are higher in saturated fat than breasts. Remove the skin before eating to reduce the overall fat content.
Are chicken thighs good for diabetics?
Yes, as they are naturally low-carb. The use of butter and garlic in this recipe will not cause blood sugar spikes.
Can I eat chicken thighs with IBS?
Yes, but be cautious with the garlic. Garlic is a high FODMAP food that can trigger symptoms for some people with IBS.
How to reheat these thighs without losing the crunch?
Use a 350°F oven for 10 minutes or an air fryer at 375°F for 5 minutes. Avoid the microwave to prevent the skin from becoming soggy.
Can I use a different pan if I don't have cast iron?
Yes, any oven safe skillet works. Ensure the pan can withstand 400°F and has a flat surface for effective searing.
Crispy Garlic Chicken Thighs