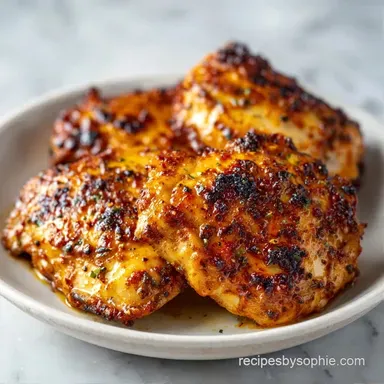
Pan Seared Garlic Thighs: Mahogany Crust
- Time: 5 min active + 15 min cook
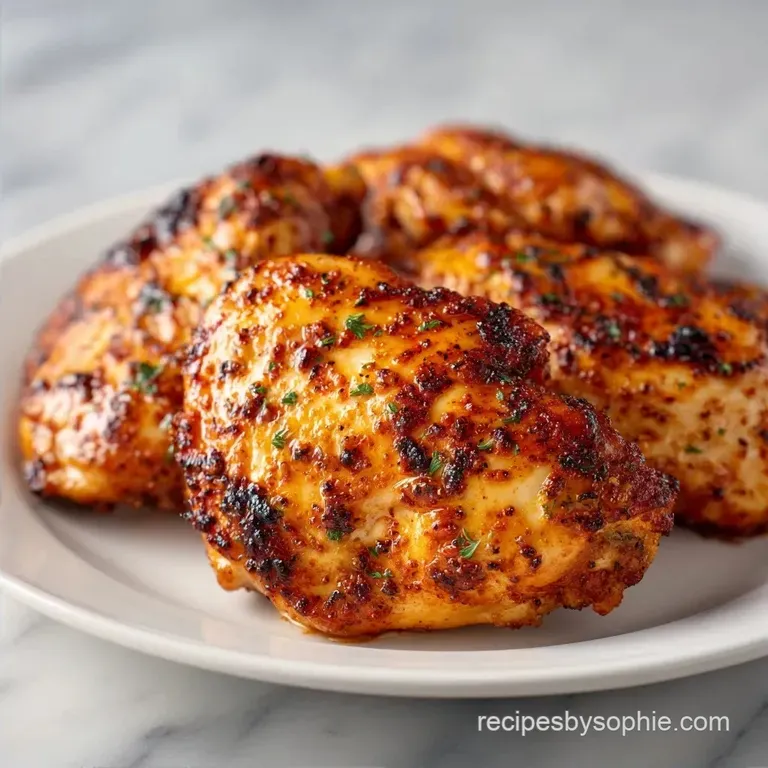
- Flavor/Texture Hook: Mahogany crust with velvety garlic butter
- Perfect for: Busy weeknights or a low effort dinner date
- Easy Pan Seared Garlic Thighs
- What Makes This Dish Work
- The Secret Component Analysis
- The Main Ingredients
- Must Have Tools
- Step By Step Process
- Common Cooking Fixes
- Troubleshooting Common Issues
- Flavor Twist Ideas
- Adjustment Guidelines
- Kitchen Truths
- Storage And Reheating
- The Best Side Dishes
- Recipe FAQs
- 📝 Recipe Card
Easy Pan Seared Garlic Thighs
That loud, aggressive sizzle the second the meat hits the hot oil is the best part. For me, this dish started after I spent way too many years eating dry, rubbery chicken breasts. I remember one night trying to be fancy with a pan sear, but the chicken was too damp, it stuck to the pan like glue, and I ended up scrubbing the skillet for twenty minutes.
I realized then that the secret isn't a fancy pan, but how you prep the meat.
Now, I stick to boneless thighs every single time. They are way more forgiving than breasts and hold onto that garlic butter flavor. This recipe is my go to when I have zero energy but still want something that tastes like it took an hour to make.
You get a deep, dark crust and a juicy center that doesn't need a side of gravy to feel complete.
When you make these Pan Seared Garlic Thighs, you'll notice the kitchen smells like a professional bistro within ten minutes. It's all about that timing between the high heat and the butter.
We're going for a specific mahogany color, not just "brown." Trust me on the pat drying part, it's the difference between a soggy piece of meat and a shatter crisp crust.
What Makes This Dish Work
Dry Surface: Removing moisture from the skin prevents the meat from steaming. This allows the surface to hit high temperatures immediately for a better crust.
High Smoke Point: Avocado oil handles the heat without burning. This lets us get the pan hot enough to sear the chicken quickly without the oil tasting bitter.
Late Garlic Addition: Adding minced garlic at the end prevents it from burning. Garlic turns acrid if it hits high heat for too long, so we introduce it only when the butter foams.
Butter Basting: Spooning melted butter over the meat creates a velvety coating. This adds fat and flavor while gently finishing the cook on the top side.
| Method | Time | Texture | Best For |
|---|---|---|---|
| Pan Seared | 20 mins | Crispy edges, juicy center | Fast weeknights |
| Oven Baked | 45 mins | Uniformly soft, tender | Large crowds |
| Slow Cooker | 6 hours | Shreddy, very soft | Meal prep |
The Secret Component Analysis
| Ingredient | Science Role | Pro Secret |
|---|---|---|
| Chicken Thighs | Higher fat content | Use room temp meat for faster searing |
| Avocado Oil | Heat stability | Prevents smoking at 400°F+ |
| Unsalted Butter | Flavor & Browning | Add cold butter for a thicker sauce |
| Lemon Juice | Acid balance | Cuts through the fat to brighten flavor |
The Main Ingredients
Gather everything before you turn on the stove. Since this moves fast, you don't want to be chopping garlic while the chicken is already browning.
- 1.5 lbs boneless skinless chicken thighs Why this? More fat means it's harder to overcook.
- 1 tsp sea salt
- 1/2 tsp black pepper
- 1 tsp garlic powder Why this? Builds a base layer of flavor before the fresh garlic.
- 1/2 tsp smoked paprika
- 1 tbsp avocado oil Why this? Won't burn at high temperatures.
- 2 tbsp unsalted butter Why this? Creates that velvety finish.
- 4 cloves garlic, minced
- 1 tbsp fresh lemon juice Why this? Wakes up the heavy butter notes.
- 1 tbsp fresh parsley, chopped
| Original Ingredient | Substitute | Why It Works |
|---|---|---|
| Avocado Oil | Grapeseed Oil | Similar high smoke point. Note: Avoid olive oil for the initial sear |
| Smoked Paprika | Sweet Paprika | Still adds color. Note: Lacks the woody, smoky depth |
| Fresh Lemon | Apple Cider Vinegar | Provides necessary acid. Note: Tastes slightly more fermented |
| Parsley | Cilantro | Adds freshness. Note: Changes the flavor profile to a more zesty, Latin vibe |
Must Have Tools
You don't need a professional kitchen, but the pan matters. I use a 12 inch cast iron skillet because it holds heat better than anything else. If you don't have one, a stainless steel pan works great too.
Avoid non stick pans for this specific recipe because they can't handle the high heat needed for that deep crust, and they often prevent the chicken from developing that "stuck then released" sear.
A pair of metal tongs is essential here. You need to be able to flip the thighs without piercing the meat, which would let the juices escape. I also recommend a meat thermometer. While the visual cues are great, hitting exactly 165°F (74°C) ensures the chicken is safe but still juicy.
Step by step Process
Phase 1: The Dry Prep
Pat the chicken thighs completely dry with paper towels. Note: Any moisture left on the surface will create steam, which kills the crust. In a small bowl, combine salt, pepper, garlic powder, and paprika. Rub this mixture evenly over both sides of the meat.
Phase 2: The over High heat Sear
Heat the avocado oil in your skillet over medium high heat until it shimmers. Place the thighs in the pan, making sure not to overcrowd them. If you put too many in at once, the pan temperature drops and you'll lose the sear.
Cook for 6-7 minutes without moving them until they release naturally from the pan and look deep brown.
Phase 3: The Garlic Baste
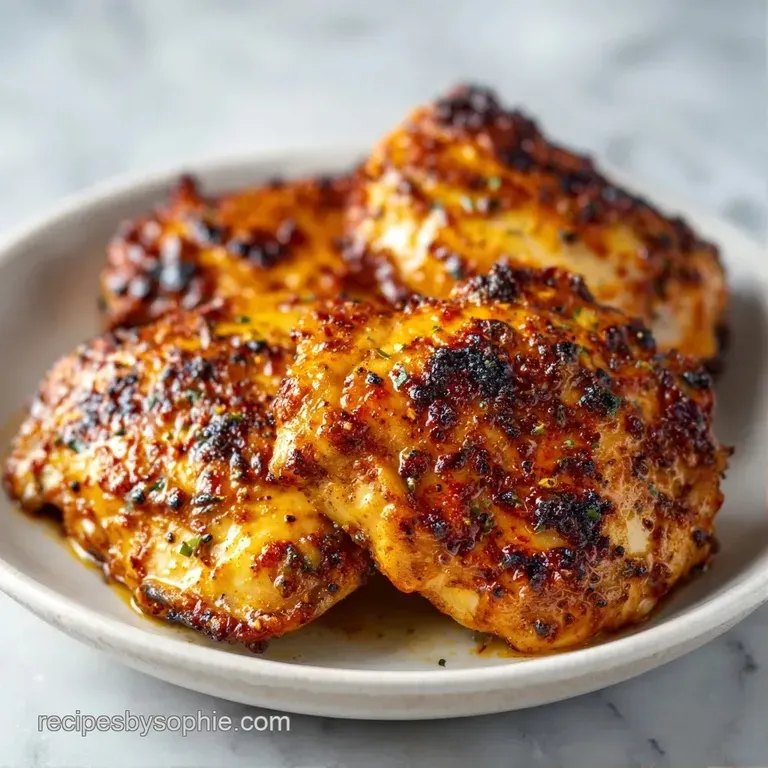
Flip the chicken and cook for another 6-8 minutes until a mahogany colored crust has formed. Reduce the heat to medium. Toss in the butter and minced garlic. As the butter foams, use a spoon to pour that garlic butter over the chicken for 2 minutes.
Phase 4: The Final Touch
Stir in the fresh lemon juice and chopped parsley. Do this just before you remove the pan from the heat. This keeps the parsley bright green and the lemon juice from evaporating too much. Let the meat rest on a plate for 5 minutes before serving.
Common Cooking Fixes
Troubleshooting Common Issues
| Issue | Solution |
|---|---|
| Why Your Chicken Sticks | If the meat won't lift, it usually means the proteins haven't finished bonding and releasing from the metal. Don't force it with the tongs, or you'll tear the crust. |
| Why Your Garlic Burned | Garlic has a very low burn point. If you add it too early or the pan is still screaming hot, it will turn black and bitter. Always drop the heat to medium before adding the butter and garlic. |
| Why The Meat is Rubbery | This happens if the pan isn't hot enough, causing the chicken to boil in its own juices rather than sear. Ensure the oil is shimmering before the meat hits the pan. |
Pro Checklist for Success:
- ✓ Pat chicken dry with a paper towel
- ✓ Do not move meat for the first 6 minutes
- ✓ Use high smoke point oil for the sear
- ✓ Add butter and garlic only at the end
- ✓ Rest the meat for 5 minutes
Flavor Twist Ideas
If you want to change things up, this base is very flexible. For a spicy version, add a pinch of cayenne pepper to the dry rub. If you're feeling fancy, you can use the pan drippings to make a Chicken Sauce for 4 recipe to pour over the top.
Another great option is a honey garlic twist. Just stir in a tablespoon of honey along with the lemon juice at the very end. The honey will caramelize quickly in the residual heat, giving the Pan Seared Garlic Thighs a sticky, sweet glaze that kids usually love.
Adjustment Guidelines
Cooking for one or two: If you're only doing 2 thighs, use a smaller pan. This keeps the butter and oil from spreading too thin, which prevents them from burning. Reduce the overall cooking time by about 20% since smaller batches often heat through faster.
Feeding a crowd: When doubling the recipe, do not cook all the chicken at once. Work in batches. If you crowd the pan, the temperature will plummet, and you'll end up with grey, steamed chicken instead of seared meat.
For the spices, only increase the salt and paprika to 1.5x rather than 2x, as these can become overpowering in larger quantities.
Kitchen Truths
The "Seal In" Myth Many people think searing "seals in the juices." This is actually not true. Searing doesn't create a waterproof barrier. The purpose of the sear is flavor and texture through browning. Moisture loss happens regardless, but the flavor gain is worth it.
The Bone In Debate Some say bone in is always better. While bone in thighs have more flavor, they take much longer to cook and are harder to sear evenly in a pan. For a 20 minute meal, boneless is the way to go.
Storage And Reheating
Store any leftovers in an airtight container in the fridge for up to 4 days. To keep them from getting rubbery, don't microwave them on high. Instead, put them back in a skillet over medium heat with a tiny pat of butter for 3-4 minutes. This helps bring back some of that crust.
These don't freeze particularly well because the butter sauce can separate, but you can freeze the cooked meat for up to 3 months. If you have leftover garlic butter in the pan, don't throw it away. Toss some steamed spinach or sautéed mushrooms in it for a quick side dish.
The Best Side Dishes
Since Pan Seared Garlic Thighs are rich and buttery, you need something to cut through that fat. A crisp salad with a sharp vinaigrette is a great choice. If you want something more filling, a Green Beans for 4 recipe combination is a classic for a reason.
For a comfort heavy meal, serve these over a bed of mashed potatoes or with some crusty sourdough bread to soak up the extra garlic butter from the plate. The lemon in the chicken pairs perfectly with a side of roasted asparagus or sautéed kale.
Recipe FAQs
What's the best recipe for creamy garlic chicken?
Try a butter based sear for a lighter profile. While this recipe uses a garlic butter glaze, you can find a richer, creamier version in our creamy garlic parmesan chicken.
How to make creamy tuscan garlic chicken at home?
Sauté chicken in butter and garlic, then stir in heavy cream and spinach. This specific recipe focuses on a lean garlic butter finish rather than a heavy cream sauce.
How to cook keto chicken with a creamy garlic sauce?
Use butter and minced garlic to create a rich, low-carb glaze. This recipe is naturally keto as it relies on avocado oil and butter without added sugars or flours.
How to cook a garlic butter chicken recipe?
Sear seasoned thighs in avocado oil for 6-7 minutes per side. Reduce heat to medium, add butter and garlic, and spoon the foaming butter over the meat for 2 minutes before finishing with lemon juice and parsley.
Can pan seared garlic thighs be finished in the oven?
No, the stovetop method is preferred here. Searing and basting exclusively in a skillet ensures the mahogany crust and garlic butter emulsion stay intact.
Can I use bone-in thighs for pan seared garlic chicken?
Yes, but increase the total cooking time. Bone-in meat takes significantly longer to reach a safe internal temperature than the boneless skinless thighs used in this recipe.
Why does my chicken stick to the pan during searing?
Wait for the proteins to bond and release naturally. If the meat won't lift, it isn't finished searing; forcing it with tongs will tear the mahogany crust.
Pan Seared Garlic Thighs in 20 Minutes