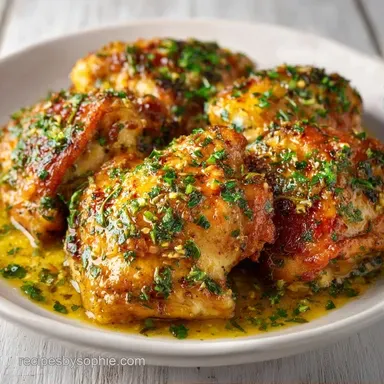
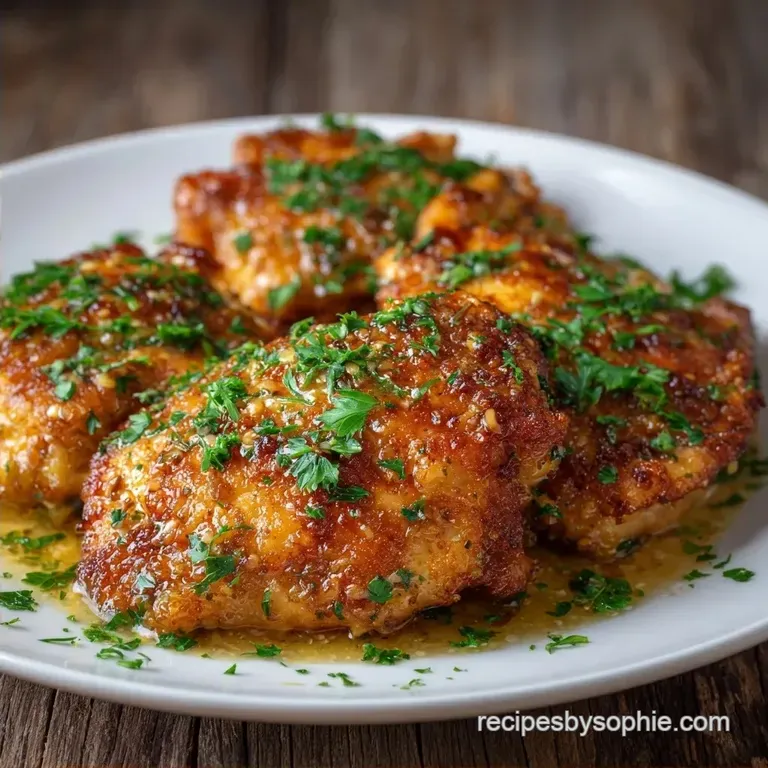
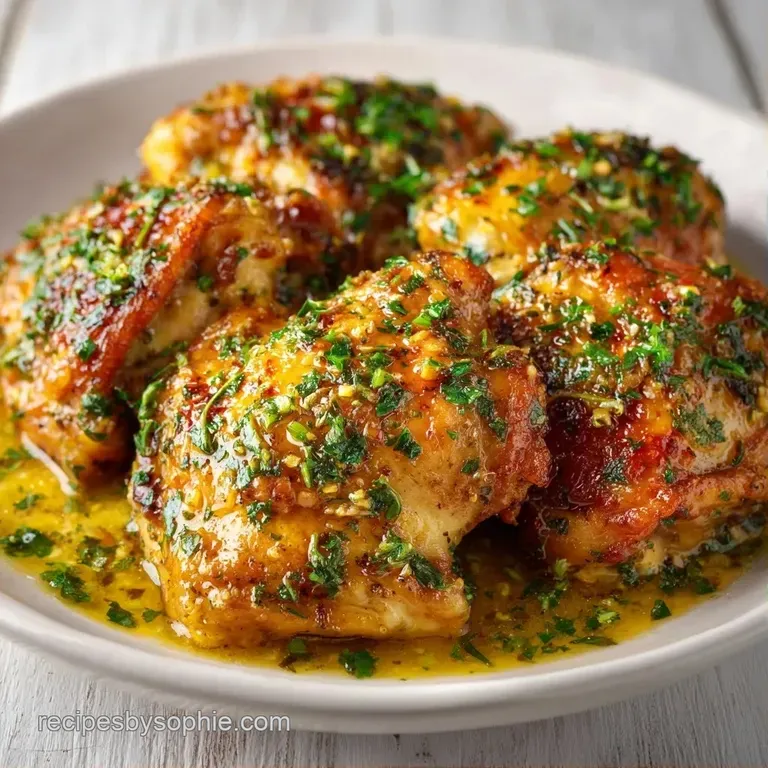
Skillet Garlic Chicken Thighs: Crispy and Juicy
- Time: 10 min prep + 20 min cook
- Flavor/Texture Hook: Shattering crispy skin with a velvety garlic finish
- Perfect for: Weeknight dinner that feels like a treat
- Easy Skillet Garlic Chicken Thighs
- Why This Recipe Works
- Ingredient Deep Dive
- Gathering All Your Ingredients
- Essential Kitchen Tools
- Step-by-Step Cooking Guide
- Fixing Common Cooking Issues
- Troubleshooting Common Issues
- Flavor Twists and Swaps
- Adjusting Your Portion Sizes
- Debunking Kitchen Myths
- Storage and Waste Tips
- Serving Suggestions
- Recipe FAQs
- 📝 Recipe Card
That loud, aggressive sizzle when the skin hits the hot oil is the best part. It's the sound of success. For a long time, I bought boneless thighs because I thought they were faster, but I was missing out on the actual soul of the dish.
The bone keeps the meat from drying out, and the skin is where all the flavor lives.
Once the garlic hits that bubbling butter, the whole kitchen smells like a bistro. You can't fake that aroma. I've spent way too many nights trying to shortcut this by using garlic powder, but fresh cloves are the only way to go.
This version of Skillet Garlic Chicken Thighs is all about patience during the sear. If you move the meat too early, you lose the crust. If you wait for the skin to release itself from the pan, you get that golden, shatter crisp texture every single time.
Easy Skillet Garlic Chicken Thighs
Right then, let's talk about the "hero" here: the skin. Most people treat skin as an afterthought, but in this recipe, it's the main event. I specifically choose bone in, skin on thighs because the fat renders out slowly, essentially frying the chicken in its own juices. According to Serious Eats, keeping the bone in helps maintain a more consistent temperature throughout the meat, which prevents the dreaded "rubbery" texture.
When you first put the thighs in the pan, don't touch them. I used to be a "flipper" I'd move the meat every two minutes just to check it. Big mistake. Every time you lift the chicken, you break the contact between the skin and the heat, and you kill your chances of a deep brown crust.
Trust me on this: pat the chicken dry. I mean really dry. If there's moisture on the skin, it steams instead of searing. You'll end up with pale, limp chicken instead of that gorgeous mahogany finish. It takes an extra minute with paper towels, but it makes all the difference.
Why This Recipe Works
Dry Surface: Removing surface moisture allows the oil to hit the protein directly, creating a crisp sear instead of steaming the meat.
Fat Rendering: Starting skin side down lets the natural chicken fat melt into the pan, which adds a deep, savory flavor to the meat.
Butter Basting: Adding butter at the end prevents the milk solids from burning while showering the chicken in a rich, garlic infused sauce.
Acid Balance: A splash of lemon juice at the very end cuts through the heavy fat of the butter and skin, brightening the whole dish.
| Method | Time | Texture | Best For |
|---|---|---|---|
| Skillet Sear | 30 mins | Shattering skin, juicy core | Quick weeknight meals |
| oven roasted | 45 mins | Evenly browned, softer skin | Large family crowds |
| Air Fryer | 25 mins | Very dry/crisp skin | Single servings |
Ingredient Deep Dive
| Ingredient | Science Role | Pro Secret |
|---|---|---|
| Bone in Thighs | Heat Buffer | The bone prevents overcooking the center |
| Unsalted Butter | Flavor Carrier | Use unsalted so you can control the salt level |
| Fresh Garlic | Aromatic Base | Mince just before adding to avoid bitterness |
| Smoked Paprika | Color/Depth | Adds a "grilled" taste without a BBQ pit |
Gathering All Your Ingredients
You don't need a fancy pantry for this. Just a few basics. I prefer kosher salt because the grains are larger and easier to distribute evenly across the skin.
- 6 bone in, skin on chicken thighs (approx. 2.5 lbs) Why this? Bone in stays juicy; skin provides the crunch
- 2 tbsp olive oil Why this? High smoke point for the initial sear
- 4 tbsp unsalted butter Why this? Creates a velvety sauce for basting
- 6 cloves garlic, minced Why this? Fresh garlic has a punch jarred garlic lacks
- 1 tbsp fresh lemon juice Why this? Cuts through the richness of the butter
- 1 tsp fresh parsley, chopped Why this? Adds a pop of color and freshness
- 1 tsp kosher salt Why this? Essential for drawing out moisture
- 1/2 tsp cracked black pepper Why this? Adds a subtle woody heat
- 1 tsp smoked paprika Why this? Gives that mahogany color and smoky note
If you're in a rush and don't have bone in thighs, you can use boneless garlic chicken thighs, but keep in mind they cook much faster and won't have that same rich depth.
Essential Kitchen Tools
You can use a stainless steel pan, but a 12 inch cast iron skillet is the gold standard here. Cast iron holds heat better than almost anything else, meaning when you drop the cold chicken in, the pan temperature doesn't plummet. This is what gives you that consistent brown.
I also suggest using metal tongs. Plastic ones can melt if they touch the side of the pan for too long. A large spoon is also necessary for the basting phase you want something that can hold a good amount of bubbling butter to pour over the meat.
Step-by-step Cooking Guide
Let's crack on. Make sure your pan is ready before the chicken goes in.
- Pat the chicken thighs completely dry with paper towels. In a small bowl, mix the salt, pepper, and smoked paprika, then rub the seasoning generously over both sides of the chicken. Note: Don't skip the drying part or you'll lose the crunch.
- Heat the olive oil in a 12 inch cast iron skillet over medium high heat until shimmering. Place thighs skin side down, pressing slightly with tongs to ensure full contact.
- Sear undisturbed for 7–9 minutes until the skin is a deep mahogany color and releases easily from the pan. Flip and cook for another 5–7 minutes.
- Reduce heat to medium. Add the butter and minced garlic to the skillet. Note: Lowering the heat prevents the garlic from burning and turning bitter.
- Tilt the pan and use a large spoon to continuously pour the bubbling garlic butter over the chicken for the final 3 minutes of cooking.
- Stir in the lemon juice and chopped parsley just before removing the pan from the heat. until the sauce is glossy and fragrant.
Chef's Note: To get the absolute best sear, let your chicken sit at room temperature for about 15-20 minutes before cooking. Cold meat can drop the pan temperature too quickly, which leads to sticking.
Fixing Common Cooking Issues
The most common complaint I hear is that the skin isn't "shattering." Usually, this comes down to two things: moisture or temperature. If the pan isn't hot enough, the fat doesn't render, and the skin just boils in its own juices.
Troubleshooting Common Issues
| Issue | Solution |
|---|---|
| Why Your Skin Stays Rubbery | This usually happens if the chicken was damp when it hit the pan. Water creates steam, and steam is the enemy of a crisp. Make sure you use more paper towels than you think you need. |
| Why Your Garlic Turns Bitter | Garlic burns fast. If you add it while the pan is still on high heat from the searing phase, it will blacken in seconds. Always drop the heat to medium before adding the butter and garlic. |
| Why The Meat Is Undone | Bone in thighs take longer than boneless. If the skin is dark but the meat is raw, you can pop the whole skillet into a 400°F (200°C) oven for 5 minutes to finish them off. |
Mistake Free Checklist:
- ✓ Chicken patted bone dry with paper towels
- ✓ Oil shimmering before the meat hits the pan
- ✓ Chicken left undisturbed for 8 minutes
- ✓ Heat reduced before adding garlic and butter
- ✓ Lemon juice added at the very end
Flavor Twists and Swaps
If you want to change the vibe of this dish, you can easily tweak the aromatics. For a sweeter version, try adding a tablespoon of honey during the butter basting phase to make Skillet Honey Garlic Chicken Thighs. The sugar will caramelize and create a sticky glaze.
For something brighter, double the lemon juice and add some lemon zest. If you're craving something richer, you can whisk in a bit of heavy cream at the end, similar to my Chicken Sauce for 4 recipe for a more restaurant style feel.
| Original Ingredient | Substitute | Why It Works |
|---|---|---|
| Unsalted Butter | Ghee (Clarified Butter) | Higher smoke point. Note: Less "milky" flavor than butter |
| Smoked Paprika | Sweet Paprika | Similar color. Note: Lacks the smoky, deep flavor |
| Olive Oil | Avocado Oil | Very high smoke point. Note: Neutral flavor, great for high heat |
| Fresh Parsley | Fresh Cilantro | Similar freshness. Note: Changes the flavor profile to be more zesty |
If you're going for a dairy-free option, swap the butter for a high-quality vegan butter or more olive oil. You'll lose some of that velvety richness, but the garlic and paprika will still carry the dish.
Adjusting Your Portion Sizes
Cooking for one or a crowd? You can scale this, but you have to be careful with the pan space.
Cutting the recipe in half: Use a smaller skillet (about 8-10 inches). Reduce the cooking time by about 20% because the pan will heat up and cool down faster. Use 2 cloves of garlic and 2 tbsp of butter.
Doubling the recipe: Do NOT crowd the pan. If you put 12 thighs in one skillet, they will release too much moisture and steam instead of sear. Work in two batches. For the seasoning, only increase the salt and paprika to 1.5x too much salt can make the skin taste metallic.
Debunking Kitchen Myths
Searing meat does not "seal in the juices." This is a classic mistake. Moisture loss happens regardless of whether you sear the meat or not. The crust is actually about flavor creating those browned, savory compounds that make the meat taste complex.
Another myth is that you should never use butter for searing. While butter burns at a lower temperature than oil, that's why we use olive oil for the initial sear and add the butter at the end. You get the over high heat benefits of oil and the flavor benefits of butter.
Storage and Waste Tips
These thighs stay great in the fridge for about 3-4 days. Store them in an airtight container with a bit of the leftover pan sauce. To reheat, avoid the microwave if you can. A quick 5 minute toss in a hot pan or an air fryer will bring that skin back to life.
For freezing, let them cool completely and freeze for up to 3 months. Thaw in the fridge overnight before reheating in the oven.
Zero Waste Tip: Don't throw away the pan drippings if you have a lot left. Pour them into a small jar and use them to sauté spinach or kale the next day. If you have leftover bones from other chicken meals, simmer them with the remaining garlic butter for a rich, quick stock.
Serving Suggestions
I love serving these over a bed of mashed potatoes or fluffy rice to soak up all that garlic butter. A side of roasted asparagus or a simple arugula salad with a sharp vinaigrette balances the richness of the chicken.
If you're feeling fancy, serve them on a platter with extra lemon wedges and a sprinkle of fresh parsley. It looks impressive but takes zero extra effort. Since the sauce is so buttery, avoid serving with other heavy creams keep the sides light and acidic.
Recipe FAQs
Are chicken thighs good for diabetics?
Yes, they are a great protein source. Because they contain no carbohydrates, they do not cause blood sugar spikes.
How long do I cook chicken thighs on a skillet?
Sear for 15-19 minutes total. Cook skin side down for 7-9 minutes, flip for 5-7 minutes, and finish basting with garlic butter for 3 minutes.
Can I eat chicken thighs with IBS?
Yes, as long as you tolerate garlic. If you are sensitive to high FODMAP ingredients, you may need to omit the minced garlic from this recipe.
How to cook chicken for diabetic patients?
Prioritize low-carb seasonings. Sear the meat in olive oil and use fresh lemon and parsley for flavor instead of sugary glazes.
How to cook a garlic butter chicken recipe?
Sear the chicken until the skin is mahogany. Reduce the heat to medium and baste the thighs with melted butter and garlic for the final few minutes.
How to make this garlic chicken creamy?
Switch to a sauce based recipe. For a rich and velvety texture, follow the method in my garlic parmesan chicken.
Is it true that I can skip drying the chicken for a good sear?
No, this is a common misconception. Excess moisture creates steam in the pan, which prevents the skin from becoming crispy.
Skillet Garlic Chicken Thighs