Father's Day Ice Cream Cake: Fudgy and Creamy

- Time: 30 min active + 6 hrs 25 min chilling
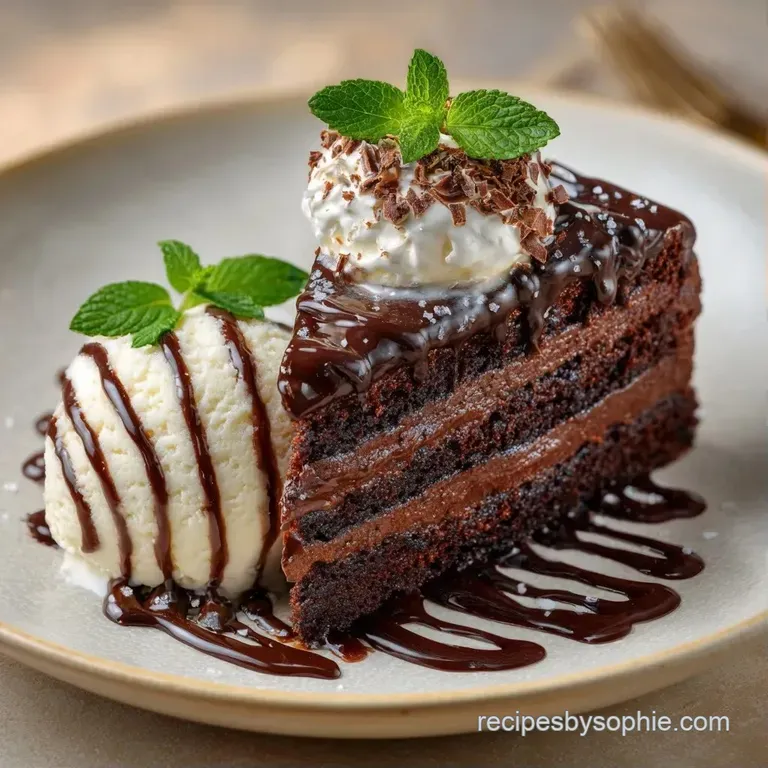
- Flavor/Texture Hook: Chewy chocolate base with a cloud like vanilla center
- Perfect for: A small family celebration or a treat for a chocolate loving dad
The smell of melting chocolate and butter hitting a hot oven is always the start of something good. I remember the first time I tried to make a dessert like this for my dad. I just layered store-bought ice cream on a cake, and by the time we sat down to eat, it had turned into a sugary soup on the plate.
It was a disaster, and we ended up eating it with spoons straight from the pan.
I spent a while figuring out how to get those clean, professional slices without needing a commercial freezer. The trick is all in the brownie base and the way you treat the ice cream. You can't just scoop and spread, or you'll fight the ice cream every step of the way.
This Fathers Day Ice Cream Cake uses a specific folding technique to keep the middle airy. You get a dense, chocolatey foundation and a creamy top that doesn't feel like a block of ice. It's straightforward, uses basic tools, and looks like you spent all day on it.
Fathers Day Ice Cream Cake
Why This Actually Works
- Whipped Cream Fold: Stirring whipped cream into softened ice cream changes the structure. It introduces air pockets, which prevents the cake from becoming too hard to cut.
- Baked In Base: By baking the brownie directly in the springform pan, you create a seamless anchor. This stops the layers from sliding apart when you slice into it.
- Ganache Seal: The chocolate ganache does more than add flavor. It creates a moisture barrier that stops the ice cream from drying out in the freezer.
| Method | Time | Texture | Best For |
|---|---|---|---|
| Baked Base | 55 min | Fudgy & Stable | Classic cake feel |
| No Bake Base | 15 min | Dense & Crunchy | Quick prep |
| Cookie Base | 10 min | Buttery & Crisp | Texture contrast |
The Basics
The ingredients here are simple, but their roles are specific. For example, using the right temperature for the ice cream is the difference between a smooth finish and a lumpy mess.
| Ingredient | What It Does | Best Swap |
|---|---|---|
| Unsalted Butter | Provides moisture and a rich crumb | Coconut oil (melted) |
| Cocoa Powder | Gives a deep, dark chocolate profile | Melted dark chocolate |
| Heavy Cream | Adds air to the ice cream and fat to ganache | Full fat coconut cream |
| Vanilla Bean Ice Cream | The primary flavor and structure | Strawberry or Mint chip |
Ingredients & Substitutes
For the Brownie Foundation
- 1/2 cup (115g) unsalted butter, melted Why this? Creates a rich, fudgy texture (Substitute: Melted coconut oil)
- 1 cup (200g) granulated sugar Why this? Helps with browning and sweetness (Substitute: Brown sugar for more chew)
- 2 large eggs Why this? Binds the batter and adds lift (Substitute: 2 flax eggs)
- 1 tsp (5ml) vanilla extract Why this? Enhances the chocolate notes (Substitute: Maple syrup)
- 1/3 cup (30g) unsweetened cocoa powder Why this? Provides the core chocolate flavor (Substitute: Dutch processed cocoa)
- 1/2 cup (65g) all purpose flour Why this? Gives the cake its structure (Substitute: Almond flour for gluten-free)
- 1/4 tsp (1.5g) salt Why this? Balances the sugar (Substitute: Sea salt)
For the Creamy Core
- 1 quart (946ml) vanilla bean ice cream, slightly softened Why this? The main body of the cake (Substitute: Any premium vanilla brand)
- 1 cup (240ml) heavy whipping cream, chilled Why this? Lightens the ice cream (Substitute: Chilled coconut cream)
- 1/4 cup (30g) powdered sugar Why this? Stabilizes the whipped cream (Substitute: Fine caster sugar)
- 1 cup (150g) crushed chocolate wafer cookies Why this? Adds a necessary crunch (Substitute: Crushed Oreos)
For the Chocolate Ganache Drip - 4 oz (115g) semi sweet chocolate, chopped Why this? Sets firmly but stays smooth (Substitute: Dark chocolate 70%) - 1/2 cup (120ml) heavy cream Why this? Creates a glossy emulsion (Substitute: Coconut
Cream)
Essential Kitchen Tools
You don't need a pastry kitchen for this. A few basic items will do the job. I suggest using a stand mixer such as KitchenAid if you have one, but a hand mixer works just fine for the cream.
- 9 inch springform pan (crucial for removing the cake)
- Parchment paper
- Offset spatula (or a butter knife)
- Large mixing bowls
- Sifter or fine mesh strainer
Detailed Making Process
Phase 1: Baking the Foundation
- Preheat your oven to 350°F (175°C). Grease the 9 inch springform pan and line the bottom with parchment paper so the brownie doesn't stick.
- Stir the melted butter and sugar together in a bowl. Whisk in the eggs and vanilla until the mixture looks smooth.
- Sift in the cocoa powder, flour, and salt. Fold the ingredients together with a spatula until just combined, but don't overmix.
- Spread the batter evenly in the pan. Bake for 20-25 minutes until the edges are set but the center still looks slightly fudgy. Let it cool completely in the pan before adding anything else.
Phase 2: Assembling the Creamy Core
- Use a chilled bowl to whip the heavy cream and powdered sugar. Keep going until stiff peaks form.
- In a separate large bowl, stir the slightly softened ice cream until it's smooth. Gently fold in the whipped cream using a spatula until no streaks remain.
- Spread half of this ice cream mixture over the cooled brownie base. Use your offset spatula to make it level.
- Sprinkle the crushed chocolate wafers evenly across the surface. Top with the remaining ice cream mixture and smooth the top.
Phase 3: The Final Flourish
- Heat the heavy cream in a small pot until it just starts simmering. Pour the hot cream over the chopped semi sweet chocolate. Let it sit for a minute, then stir until it becomes a glossy, smooth ganache. According to the techniques at Serious Eats, not overheating the chocolate prevents it from separating. Pour the ganache over the chilled cake.
- Place the cake in the freezer for at least 6 hours. This is the hardest part, but it's necessary for the layers to set.
Tips and Common Pitfalls
The most common issue is the "melting" phase. If your brownie base is even slightly warm, the ice cream will melt into it, and you'll lose the distinct layers. Wait until the base is room temperature or even chilled.
Why Is My Ice Cream Too Hard?
If the ice cream is too cold, you'll end up with clumps of frozen cream and streaks of whipped cream. It won't be a cohesive layer.
| Problem | Root Cause | Solution |
|---|---|---|
| Lumpy layers | Ice cream too cold | Let it sit at room temp for 10-15 mins |
| Melting base | Brownie was warm | Chill the base in the fridge first |
| Sinking wafers | Ice cream too soft | Freeze the first layer for 20 mins before adding cookies |
How Do I Stop the Melting?
Work quickly. If you find the ice cream is softening too fast while you're spreading it, put the whole pan in the freezer for 10 minutes to firm it up, then finish the assembly.
Why Did My Layers Blend?
This usually happens when the folding process is too aggressive. Use a gentle "over and under" motion with your spatula rather than stirring in circles.
Easy Ingredient Swaps
If you're making this for someone with specific needs, you can tweak a few things. For a version that skips the oven entirely, you might enjoy an Easy No Bake Cheesecake as a different kind of cold treat.
- gluten-free: Use a 1:1 gluten-free flour blend for the brownie base. The texture stays almost identical.
- dairy-free: Use coconut cream for the whipping and ganache, and a cashew based vanilla ice cream. Note: Coconut cream must be chilled overnight to whip.
- Fruit Twist: Swap the vanilla ice cream for strawberry and use crushed graham crackers instead of chocolate wafers.
Adjustment Guidelines
Making a Smaller Cake If you only have an 8 inch pan, you can use the same recipe. The cake will just be taller. Reduce the baking time for the brownie base by about 5 minutes.
Making a Larger Batch If you need to double this for a big party, I recommend making two separate 9 inch cakes. Doubling the batter in one pan often leads to raw centers and burnt edges. For the ice cream, work in batches so it doesn't melt before you get it into the pan.
| Goal | Change | Result |
|---|---|---|
| More Crunch | Double the wafers | Heavier texture, more contrast |
| Less Sweet | Use 85% Dark Chocolate | Bitter edge to balance the ice cream |
| Extra Rich | Add 1 tbsp espresso powder | Deeper chocolate flavor in the base |
Common Dessert Myths
Searing chocolate or "blooming" cocoa powder isn't always necessary for a home cake. While some say you must heat the cocoa with butter first, simply sifting it in works perfectly for a fudgy base like this.
Another myth is that you need a professional blast freezer to get clean slices. You don't. A standard home freezer works fine as long as you let the cake set for the full 6 hours and dip your knife in hot water between each cut.
Storage and Zero Waste
Freezer Life This Fathers Day Ice Cream Cake keeps well in the freezer for up to 2 weeks. Keep it wrapped in plastic wrap or in an airtight container to prevent freezer burn. If you're planning a smaller gathering, you might prefer a No Bake Father's Day Dessert which is easier to scale down.
Reheating and Slicing Never reheat this cake. To get the best slice, take it out of the freezer and let it sit on the counter for 5-10 minutes. Use a sharp knife dipped in hot water and wiped dry between every single slice.
Zero Waste Tips If you have leftover brownie batter, bake it in a muffin tin for "mini brownies" to use as cake toppers. Any leftover ganache can be drizzled over fresh strawberries or stirred into your morning coffee for a mocha treat.
Best Pairing Ideas
Since this Fathers Day Ice Cream Cake is quite rich, you want something to cut through the sugar.
- The Bitter Contrast: Serve it with a strong, unsweetened espresso or a dark roast coffee. The bitterness of the coffee balances the sweetness of the vanilla cream.
- Fresh Fruit: A handful of fresh raspberries or sliced strawberries on the side adds a tartness that clears the palate.
- Salty Crunch: A sprinkle of flaky sea salt on top of the ganache right before serving makes the chocolate flavor pop.
Recipe FAQs
How to slice the cake for clean edges?
Dip a sharp knife in hot water and wipe it dry. Let the cake sit at room temperature for 5-10 minutes before cutting to ensure a professional finish.
Can I layer the ice cream immediately after baking the base?
No, wait until the brownie base is completely cool. If the base is even slightly warm, the ice cream will melt into the cake and ruin the distinct layers.
Is it true the cake must freeze for 24 hours before serving?
No, this is a common misconception. The cake sets perfectly and is ready to serve after freezing for at least 6 hours.
How to make the chocolate ganache topping?
Heat heavy cream until simmering and pour it over chopped semi sweet chocolate. Let the mixture sit briefly, then stir until smooth before pouring it over the chilled cake.
How long does the cake last in the freezer?
Store it for up to 2 weeks. Use plastic wrap or an airtight container to prevent freezer burn from affecting the texture.
What is a great main course to serve before this dessert?
Pair it with savory garlic chicken thighs for balance. The salty, aromatic profile of the chicken provides a great contrast to the rich chocolate and sweet ice cream.
How to make the cake appear very fancy for Father's Day?
Smooth the ice cream layers with an offset spatula. This creates clean, level lines and a polished look that mimics a professional bakery cake.
Fathers Day Ice Cream Cake

