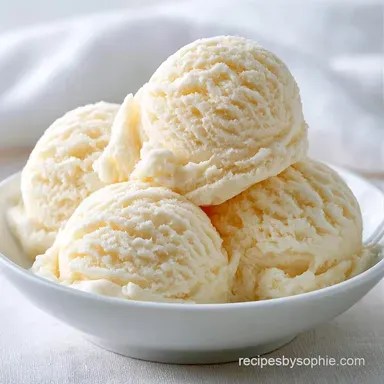
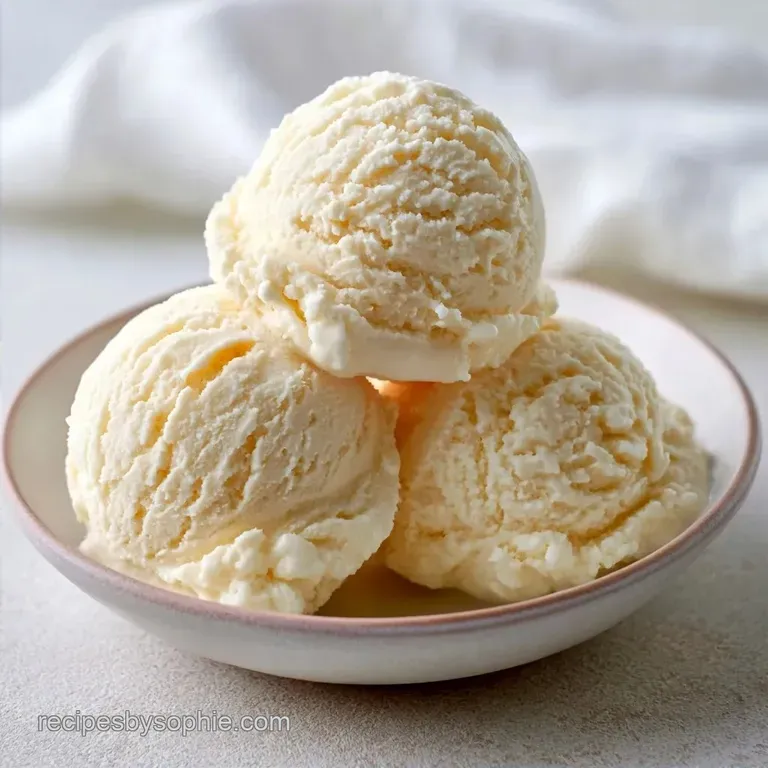
Vanilla Ice Cream: Creamy Homemade Treat
- Time:10 minutes active + 6 hours 40 mins total
- Flavor/Texture Hook: Rich, creamy, and clean vanilla taste
- Perfect for: Quick desserts, summer treats, or a base for sundaes
The smell of pure vanilla hitting a cold bowl is one of those things that just feels like home. I used to think you needed a culinary degree or a fancy torch to get a professional result, but it really comes down to the vanilla extract.
If you use the cheap imitation stuff, the flavor disappears the moment it hits your tongue.
I switched to a high-quality pure extract, and it changed everything. The flavor stays bold even when the temperature drops. This Easy Vanilla Ice Cream doesn't require you to boil milk or temper eggs, which means you can't accidentally scramble your base.
You can expect a result that's rich and dense. It's not as airy as the store-bought tubs, but it tastes more authentic because it isn't filled with stabilizers.
Why This Vanilla Ice Cream Works
- Sugar's Role: Sugar doesn't just add sweetness, it lowers the freezing point of the mixture so it doesn't turn into a solid block of ice.
- Fat Balance: The heavy cream provides the structure. More fat means fewer ice crystals, which keeps the texture velvety.
- Air Integration: Churning or whisking traps tiny air bubbles. Without these, the dessert would feel like a frozen popsicle instead of a scoopable treat.
| Method | Time | Texture | Best For |
|---|---|---|---|
| No Cook (This) | 10 min prep | Dense & Rich | Quick cravings |
| Custard (Stovetop) | 40 min prep | Heavy & Smooth | Formal dinner parties |
Ingredient Deep Dive
| Ingredient | What It Does | Best Swap |
|---|---|---|
| Heavy Cream | Provides creaminess | Full fat coconut milk |
| Granulated Sugar | Controls freezing point | Honey or Maple syrup |
| Vanilla Extract | Primary flavor profile | Vanilla bean paste |
Ingredients and Smart Swaps
- 2 cups heavy whipping cream Why this? High fat content prevents icing.
- 1 cup whole milk Why this? Balances the thickness of the cream.
- 3/4 cup granulated sugar Why this? Dissolves easily for a smooth finish.
- 1 tbsp pure vanilla extract Why this? Deep, authentic flavor.
- 1/4 tsp fine sea salt Why this? Cuts through the sweetness.
| Original Ingredient | Substitute | Why It Works |
|---|---|---|
| Heavy Cream | Coconut Cream (full fat) | Similar fat levels. Note: Adds a tropical flavor |
| Whole Milk | Almond Milk (unsweetened) | Provides liquid base. Note: Thinner texture, more ice crystals |
| Granulated Sugar | Maple Syrup | Natural sweetener. Note: Changes flavor to maple vanilla |
This Homemade Vanilla Ice Cream Recipe works well because the ratios are balanced. If you love this base, you can use it for other treats like a No Bake Peanut Butter Pie by adding nut butter to the mix.
Tools for the Job
You don't need a professional kitchen for this. A large mixing bowl and a sturdy whisk are the basics. If you have an ice cream maker, that's great, but a shallow metal pan works for the manual method. For those with a Ninja Creami, a standard pint container is all you need.
Making the Ice Cream
- Combine the granulated sugar, salt, and whole milk in a large bowl.
- Whisk vigorously for 2-3 minutes until the sugar is completely dissolved and the liquid looks clear.
- Stir in the heavy cream and vanilla extract until the mixture is a uniform ivory color.
- Churn the mixture. Use an ice cream maker for 20-30 minutes for an Easy Vanilla Ice Cream With Ice Cream Maker result.
- For an Easy Vanilla Ice Cream Without Machine, freeze in a shallow pan and whisk every 30 minutes for 3-4 hours.
- If using a Ninja Creami, freeze in the pint for 24 hours then process on the Ice Cream setting for an Easy Vanilla Ice Cream Ninja Creami finish.
- Transfer the churned ice cream into an airtight container.
- Press a piece of parchment paper or plastic wrap directly onto the surface until it touches the cream to stop freezer burn.
- Freeze for at least 4 hours before scooping.
Troubleshooting Your Texture
It can be frustrating when your dessert comes out more like a granita than a cream. Most of the time, it's a temperature or mixing issue. According to Serious Eats, the amount of sugar is critical for controlling ice crystal growth.
Fixing Icy Texture
If you see ice shards, you might have skipped the whisking step or used low-fat milk. Ensure the sugar is fully dissolved before freezing.
Solving Grainy Sugar
Graininess happens when sugar doesn't melt into the milk. Whisk for a full 3 minutes. If it's already frozen, let it soften slightly and whisk it again.
Preventing Buttering
Over churning can cause the fat to separate, creating tiny butter bits. Stop the machine as soon as the mixture reaches a soft serve consistency.
| Problem | Root Cause | Solution |
|---|---|---|
| Icy shards | low fat or too little sugar | Use heavy cream, not half and half |
| Sandiness | Undissolved sugar | Whisk longer at the start |
| Too Hard | Too much milk | Add 1 tbsp of vodka or corn syrup |
If you find your ice cream is too firm, let it sit on the counter for 5 minutes. This is a common issue when making something like a Homemade Ice Cream Cake where the layers are thick.
Easy Flavor Variations
- Vanilla Bean Twist: Use a vanilla bean pod instead of extract. Scrape the seeds into the milk for those classic black specks.
- Maple Swap: Replace sugar with maple syrup. This makes it a 3 Ingredient Ice Cream if you omit the salt and extract.
- Egg Free Perk: This is an Easy Vanilla Ice Cream Without Eggs, making it safer for those who avoid raw yolks and giving it a cleaner taste.
Storage and Freezing Tips
Keep your container in the back of the freezer, not the door. The door temperature fluctuates every time you open it, which causes the edges to melt and refreeze, creating ice crystals. It stays fresh for about 2 weeks.
For zero waste, don't toss the plastic wrap you used to cover the top. If you're using a reusable container, a simple silicone lid works best. If you have leftover base that hasn't been frozen, it can be used as a creamer for your morning coffee.
Serving Your Scoops
Use a warmed scoop for the cleanest spheres. Dip the metal scoop in hot water for 10 seconds between every single scoop. This prevents the ice cream from sticking and tearing.
Serve it in a chilled bowl to keep it from melting too fast. It goes great with fresh berries or a drizzle of salted caramel. If you're feeling fancy, add a pinch of flaky sea salt on top to make the vanilla pop.
Recipe FAQs
How to make the easiest vanilla ice cream at home?
Whisk granulated sugar, salt, and whole milk for 2-3 minutes until the sugar dissolves. Stir in heavy cream and vanilla extract, then churn in a machine or freeze manually.
How to make vanilla ice cream without an ice cream maker?
Freeze the mixture in a shallow pan and whisk vigorously every 30 minutes for 3 to 4 hours. This manual agitation breaks up ice crystals to ensure a smoother texture.
Is this a no-egg dessert recipe?
Yes, this recipe is completely egg-free. It relies on the fat content of heavy cream and whole milk to create a rich, creamy consistency without needing a custard base.
Why is my ice cream grainy instead of smooth?
The sugar likely didn't dissolve completely. Whisk the sugar, salt, and milk until the liquid is clear before adding other ingredients. If you enjoyed mastering this smooth consistency, see how similar emulsion principles work in our garlic chicken penne.
How to prevent freezer burn in homemade ice cream?
Press parchment paper or plastic wrap directly onto the surface of the ice cream. This physical barrier prevents air contact and stops ice crystals from forming on top.
Is it true that homemade ice cream must contain eggs to be creamy?
No, this is a common misconception. Using a high ratio of heavy cream provides enough fat for a luxurious mouthfeel without the need for egg yolks.
How to store homemade vanilla ice cream to keep it fresh?
Place the airtight container in the back of the freezer. Avoiding the freezer door prevents temperature fluctuations that cause the edges to melt and refreeze.
Homemade Vanilla Ice Cream