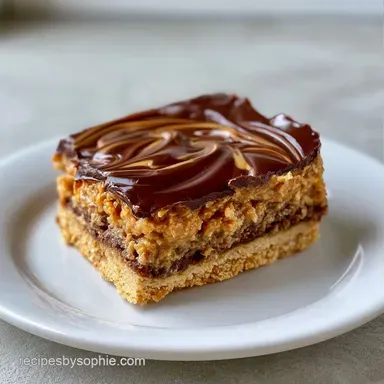
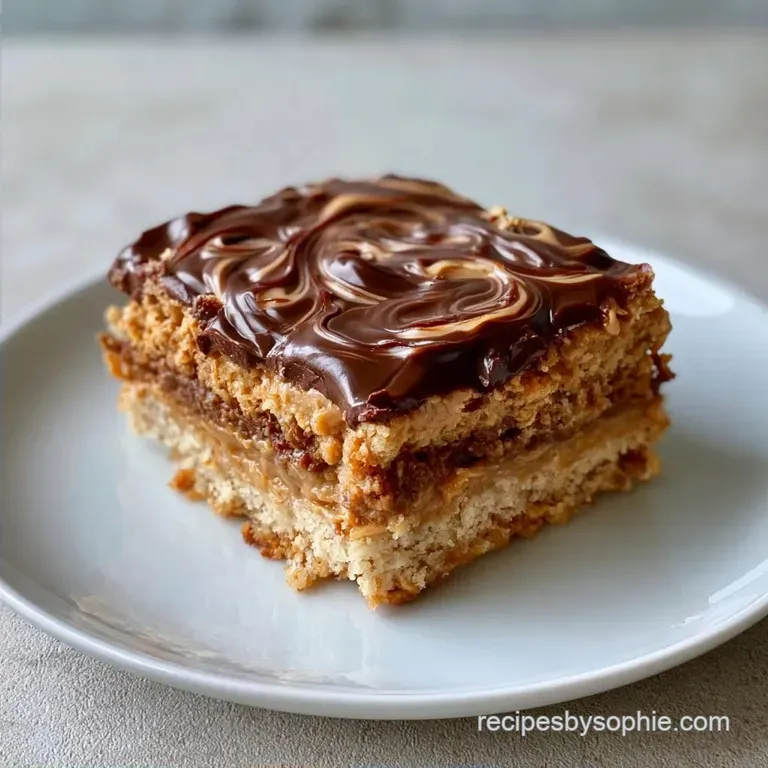
Old Fashioned Peanut Butter Chocolate Bars
- Time: 15 min active + 2 hours chilling
- Flavor/Texture Hook: Salty, dense base with a glossy chocolate cap
- Perfect for: Last minute parties or a high energy snack
The smell of toasted graham crackers and melted chocolate always takes me back to my first attempt at these. I remember the frustration of my first batch, where the base was so crumbly it basically disintegrated the moment I tried to lift a slice.
It felt like I was eating a pile of peanut butter sand rather than a structured dessert.
I realized the issue wasn't the ingredients, but how I handled the pressure. You have to really pack that base down, almost like you're tamping a road, to get it to hold. Once I figured that out, these Peanut Butter Chocolate Bars became my go to for whenever I need something sweet but don't want to turn on the oven.
You can expect a dense, fudge like bottom and a smooth topping that doesn't snap like a commercial candy bar. It's a more relaxed, home style treat that feels heavy in the hand and rich on the tongue.
Peanut Butter Chocolate Bars That Actually Hold
The Fat Balance: Combining melted butter with peanut butter creates a stable structure that stays firm but doesn't turn into a brick when chilled.
The Sugar Bind: Powdered sugar dissolves faster than granulated sugar, which prevents the base from feeling gritty and helps it glue together.
Chocolate Softening: Adding a small amount of peanut butter to the chocolate chips stops the topping from cracking when you slice into it.
| Method | Time | Texture | Best For |
|---|---|---|---|
| Microwave/No Bake | 15 min active | Fudgy and dense | Quick cravings |
| Oven Baked | 45 min active | Cake like/Crispy | Traditional parties |
What Each Ingredient Does
| Ingredient | What It Does | Best Swap |
|---|---|---|
| Graham Crumbs | Provides the structural frame | Almond flour (denser) |
| Unsalted Butter | Binds crumbs and adds richness | Coconut oil (softer) |
| Peanut Butter | Adds salt and creaminess | Almond butter (nuttier) |
| Powdered Sugar | Sweetens and thickens | Maple sugar (earthy) |
Ingredients and Substitutes
- 1.5 cups (150g) graham cracker crumbs Why this? Creates a sturdy, classic crust base
- 0.5 cup (115g) unsalted butter, melted Why this? Essential for binding the dry crumbs
- 1 cup (250g) creamy peanut butter Why this? The main flavor and fat source
- 2 cups (240g) powdered sugar Why this? Keeps the texture smooth and fudge like
- 1.5 cups (255g) semi sweet chocolate chips Why this? Balances the salt of the PB
- 2 tbsp (32g) creamy peanut butter Why this? Keeps the chocolate layer flexible
If you're looking for a different vibe, you can use dark chocolate for a more intense flavor. According to the USDA FoodData, different cocoa percentages will change the sugar content, so you might want to add a teaspoon of honey if the dark chocolate is too bitter.
Bringing It Together
- Combine the graham cracker crumbs, melted butter, peanut butter, and powdered sugar in a medium bowl. Mix until the dough is uniform and holds together when pressed.
- Press the mixture firmly into the bottom of a parchment lined 9x9 inch pan until smooth and dense. Note: Use the bottom of a glass to pack it tight
- In a microwave safe bowl, combine chocolate chips and 2 tbsp of peanut butter.
- Microwave in 30 second intervals, stirring in between, until the mixture is glossy and fluid.
- Pour the chocolate over the peanut butter layer and spread evenly with a spatula.
- Place the pan in the refrigerator for at least 2 hours until the topping is firm to the touch.
- Lift the parchment paper to remove the block from the pan.
- Slice into 12 equal rectangles using a sharp knife.
Pro Tips and Pitfalls

Getting the chocolate right is where most people trip up. If you overheat the chocolate in the microwave, it separates and becomes grainy. Always stir every 30 seconds. The residual heat usually finishes the melting process even if a few lumps remain after the last zap.
I once tried to slice these while they were only an hour into the fridge. The result was a messy smudge of chocolate all over the peanut butter layer. Patience is mandatory here. Let them set fully so the layers stay distinct.
Why Your Base Crumbles
If the base falls apart, you likely didn't press it hard enough or your butter wasn't fully melted. The butter needs to coat every grain of the graham cracker to create a seal.
Why Your Chocolate Cracks
This usually happens when using chocolate chips without a softener. The 2 tbsp of peanut butter acts as an stabilizer, preventing the chocolate from becoming too brittle.
Getting Clean Cuts
Dip your knife in hot water and wipe it dry between every single cut. This prevents the chocolate from dragging down into the peanut butter layer.
| Problem | Root Cause | Solution |
|---|---|---|
| Greasy Base | Too much butter | Add 2 tbsp more crumbs |
| Grainy Chocolate | Overheated in microwave | Stir more often, shorter bursts |
| Soft Middle | Not chilled long enough | Wait full 2 hours |
Make It Your Own
You can easily turn these into Peanut Butter Chocolate Bars Protein snacks by swapping some of the powdered sugar for a vanilla protein powder. Just keep in mind that protein powder absorbs more moisture, so you might need an extra tablespoon of melted butter to keep it from being too dry.
For those who prefer a salty sweet contrast, sprinkle a pinch of flaky sea salt over the chocolate before it sets. It cuts through the richness and makes the peanut butter pop. If you want something even more indulgent, you could layer in some crushed pretzels for a bit of crunch.
If you're in the mood for something different but similar flavors, you might enjoy a Chocolate Peanut Butter Cake for a lighter, fluffier texture.
Adjusting the Batch Size
When you're making a half batch, use a loaf pan instead of a 9x9 square pan. This keeps the layers at the correct thickness. If you use the large pan for a small amount of dough, the bars will be paper thin and will likely crack when you try to lift them.
If you're doubling the recipe for a crowd, work in batches for the chocolate melting. Microwaving four cups of chocolate at once often leads to hot spots and burnt edges. Use two separate bowls to ensure a smooth, glossy finish across the whole tray.
| Batch Size | Pan Size | Chilling Time | Adjustment |
|---|---|---|---|
| Half (1/2) | Loaf Pan | 1.5 hours | Use 1/2 egg (beat then split) if adding binders |
| Double (2x) | 9x13 Pan | 3 hours | Increase salt by 1.5x only |
Common Kitchen Myths
Some people claim you need to temper chocolate to get a professional finish. For these bars, that's overkill. The addition of peanut butter changes the structure of the chocolate enough that it stays stable without the complex heating and cooling cycles of tempering.
Another myth is that you can replace powdered sugar with granulated sugar. In a no bake recipe, granulated sugar won't dissolve. You'll end up with a gritty, sandy texture that feels unpleasant to eat. Stick to the powdered version for that fudge like consistency.
Storage and Zero Waste
Keep these in an airtight container in the fridge for up to 10 days. They stay freshest when they aren't exposed to air, which can make the edges of the graham cracker base dry out.
For longer storage, these are great in the freezer for up to 3 months. I actually prefer eating them slightly frozen, as it gives the chocolate a satisfying snap. Just let them sit at room temperature for 5 minutes before eating so they aren't rock hard.
If you have any broken pieces or "ugly" edges from slicing, don't toss them. Throw those scraps into a bowl of Vanilla Ice Cream for an instant peanut butter parfait. You can also melt the scraps down to use as a dip for apple slices.
Pairing Ideas
These are incredibly rich, so you need something to cut through the fat. A cold glass of skim milk or an unsweetened almond milk is the classic choice. The neutrality of the milk cleanses the palate between bites.
If you're serving these at a brunch, pair them with a strong, black coffee. The bitterness of the espresso balances the heavy sweetness of the powdered sugar. For a more sophisticated treat, try serving a small square alongside some fresh raspberries or sliced strawberries to add a bit of acidity.
Recipe FAQs
How long do these bars last in the fridge?
Up to 10 days. Keep them in an airtight container to prevent the edges of the graham cracker base from drying out.
How to slice the bars without cracking the chocolate?
Lift the parchment paper to remove the block from the pan. Use a sharp knife to cut the block into 12 equal rectangles.
How to melt the chocolate for the topping?
Microwave in 30-second intervals. Stir between each interval until the chocolate and peanut butter are glossy and fluid.
Is it true I need to bake the base for these to hold together?
No, this is a common misconception. These are no-bake bars that set firmly after refrigerating for at least 2 hours.
Can these be stored in the freezer?
Yes, they last up to 3 months. Let them sit at room temperature for 5 minutes before eating for a satisfying chocolate snap.
Why is my base too soft or crumbling?
Press the mixture firmly into the 9x9 inch pan. Ensure the graham cracker crumbs, butter, peanut butter, and powdered sugar are mixed until the dough is uniform and dense.
What other simple treats can I make for guests?
Try a chilled cake or cheesecake. If you enjoyed the no-bake assembly here, see how the same chilling principle works in our no bake dessert.
Peanut Butter Chocolate Bars