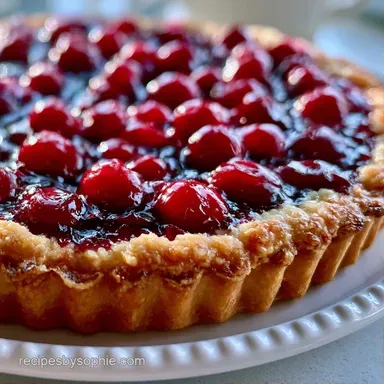
Easy Homemade Cherry Pie with Buttery Crust
- Time: 30 min active + 30 min chilling
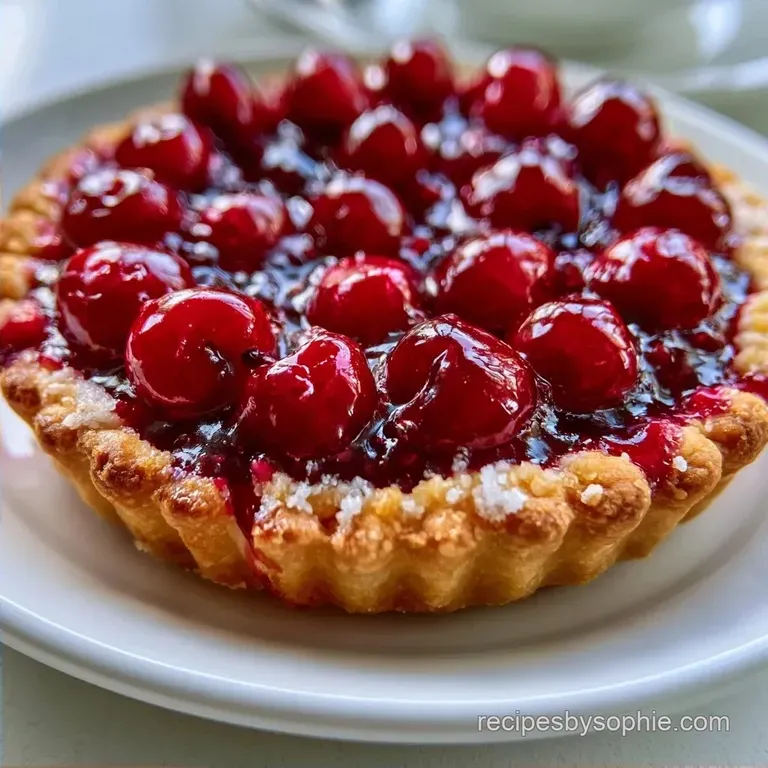
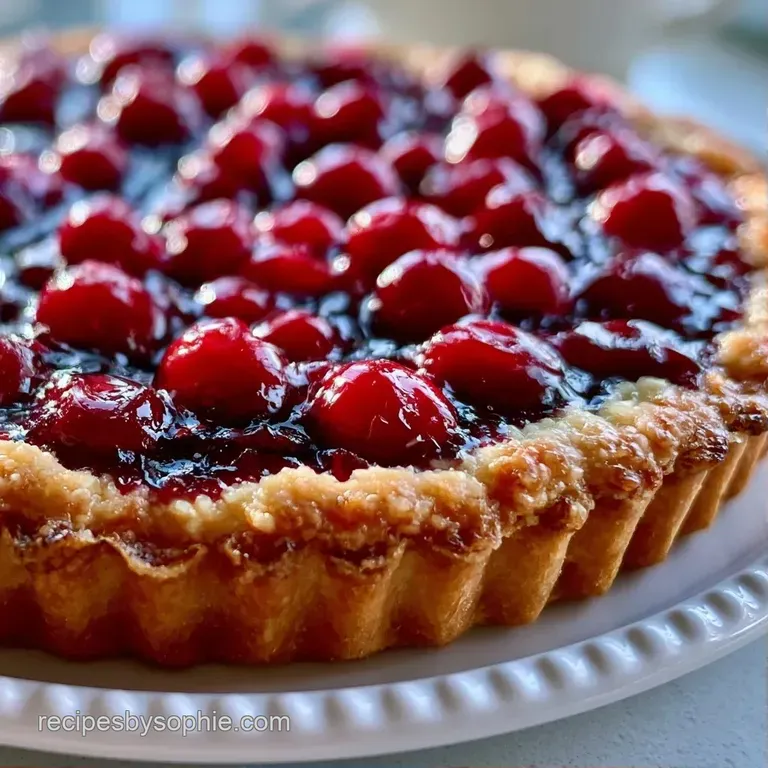
- Flavor/Texture Hook: Tart cherries in a buttery, mahogany brown crust
- Perfect for: Sunday family dinners or holiday potlucks
The smell of bubbling cherries and browned butter always takes me back to my grandmother's kitchen, though my first few attempts were a disaster. I once over mixed my dough so much that the crust came out like a hard cracker instead of a flaky pastry. It was an expensive lesson in patience and temperature.
Now, I stick to a few simple rules that make the process stress free. Making an Easy Homemade Cherry Pie doesn't have to be an all day ordeal if you manage your timing right.
You can expect a pie with a rich, glossy filling and a crust that actually holds up under the weight of the fruit. We'll focus on keeping the fat cold and the fruit thickened so you don't end up with a soggy mess.
Easy Homemade Cherry Pie
Right then, let's get into the actual process. The first thing you need to remember is that temperature is everything when you're working with butter. If the butter melts before it hits the oven, you lose those flaky layers.
I've found that using a pastry cutter is way faster than using a fork, and it keeps your hands from warming up the dough. If you don't have one, a cold grater works too. Just make sure your butter is chilled in the fridge until the moment you need it.
Trust me on this, don't skip the chilling time for the dough. Those 30 minutes allow the gluten to relax and the fat to firm up again. It's the difference between a crust that shrinks in the pan and one that stays put.
Why we simmer the fruit
Heating cherries with cornstarch thickens the juice into a glossy sauce. This prevents the liquid from soaking into the crust and making it soggy.
Tips for Flaky Crust
Keeping the fat cold is the most important part of this process. When those little lumps of butter melt in the oven, they create steam pockets that lift the flour, creating layers. According to the guides at Serious Eats, avoiding over handling the dough prevents too much gluten from developing, which keeps the pastry tender.
If you notice the dough getting sticky or soft while you're rolling it out, just pop it back in the fridge for 10 minutes. It's better to pause than to end up with a dough that sticks to everything. I've learned that working in small batches of dough is much easier than trying to manage one giant mass.
For the lattice top, don't worry about it looking like a professional bakery piece. The gaps are there to let steam escape, so as long as it covers most of the pie, it does its job. A slightly messy lattice often looks more "homemade" and charming anyway.
Maintaining Cold Fat
Keep your butter in the fridge until the last second. Use ice cold water to bind the dough, which ensures the fat stays in solid pea sized lumps.
Assembling the Lattice
Cut your second dough disc into strips. Fold them over each other in a weave pattern, tucking the ends under the bottom crust and pinching them tight to seal.
| Method | Time | Texture | Best For |
|---|---|---|---|
| Quick Chill | 2 hours | Flaky and Tender | Weekends |
| Traditional | 4+ hours | Extra Flaky | Special Events |
What Each Ingredient Does
Every part of an Easy Homemade Cherry Pie components list has a specific job. The flour provides the structure, while the butter creates the lift. Sugar in the crust is minimal, just enough to help it brown without burning too quickly.
Cherries provide the bulk of the flavor, but the almond extract is what gives it that "classic bakery" taste. It enhances the natural nuttiness of the cherries without overpowering them. You can find more about the nutritional profile of these fruits through USDA FoodData.
The cornstarch is our insurance policy. Without it, the cherries would release too much water during the 60 minute bake, leaving you with a soup instead of a filling.
| Ingredient | What It Does | Best Swap |
|---|---|---|
| All Purpose Flour | Provides structure | Pastry flour (more tender) |
| Unsalted Butter | Creates flakiness | Shortening (sturdier crust) |
| Cornstarch | Thickens filling | Arrowroot powder (clearer gloss) |
| Almond Extract | Adds depth | Extra vanilla extract |
Basic Tool Kit
You don't need a professional kitchen to pull this off. A large mixing bowl and a pastry cutter (or two forks) are the basics. A 9 inch deep dish pie plate is essential here because this filling is quite heavy.
A rolling pin is necessary to get the dough to an even thickness. If you don't have one, a smooth wine bottle works in a pinch. Just make sure you have plenty of floured surface area so the dough doesn't grab the counter.
Finally, a pastry brush for the egg wash makes a huge difference. It's how you get that professional mahogany glow on the crust.
Making the Pie
Let's crack on with the actual steps. Follow these closely to ensure your Easy Homemade Cherry Pie dough stays cold and your filling stays thick.
- Whisk flour, sugar, and salt in a bowl.
- Use a pastry cutter to integrate chilled butter into the dry ingredients until the mixture looks like coarse crumbs with pea sized lumps.
- Add ice water one tablespoon at a time, stirring until the dough just holds together. Note: Stop adding water as soon as it clumps; too much water makes the crust tough.
- Divide into two discs, wrap in plastic, and chill for 30 minutes.
- Combine cherries, sugar, cornstarch, lemon juice, vanilla, almond extract, and cinnamon in a saucepan.
- Heat over medium for 5-8 minutes, stirring constantly until the juices thicken slightly and become glossy.
- Let the filling mixture cool slightly. Note: Hot filling can melt the butter in your raw crust immediately.
- Roll one dough disc into a 12 inch circle and press it into a 9 inch deep dish pie plate.
- Pour the thickened Easy Homemade Cherry Pie filling into the crust, spreading it evenly.
- Roll the second disc and create a lattice top, sealing the edges.
- Brush the crust with beaten egg and sprinkle with coarse sugar.
- Bake for 60 minutes until the crust is mahogany colored and the filling is bubbling.
Chef's Note: To get a really clean lattice, chill your dough strips in the freezer for 5 minutes before weaving. They'll hold their shape much better and won't stretch out of place.
Troubleshooting Your Bake
Even with a plan, things can go sideways. The most common issue is a crust that doesn't brown or a filling that runs.
| Issue | Solution |
|---|---|
| Why Your Crust Stays Pale | If your crust looks white after 60 minutes, your oven might be running cold, or you skipped the egg wash. The egg provides the protein and fat needed for that deep brown color. |
| Why Your Filling Is Too Runny | This usually happens if the cornstarch wasn't fully dissolved or the filling didn't simmer long enough. The bubbles should be thick and slow, not watery. |
| Why Your Bottom Crust Is Soggy | A "soggy bottom" happens when the fruit juices soak into the dough before it sets. Simmering the filling beforehand and ensuring the oven is fully preheated helps the bottom crust sear quickly. |
Creative Flavor Twists
Once you've nailed the Easy Homemade Cherry Pie size and shape, you can start playing with the flavors. I love adding a bit of orange zest to the filling for a brighter, more citrusy note.
If you want something different, you can try an Easy Homemade Cherry Pie twist by mixing in a cup of fresh blueberries or raspberries. This creates a mixed berry vibe that's still centered around the cherry flavor. For a different kind of dessert altogether, you might enjoy making some no bake peanut butter bars for a crowd.
For those who aren't fans of making dough from scratch, using ready-made chilled pastry is a totally acceptable shortcut. Just make sure it's the "all-butter" kind for the best taste.
Decision Shortcut:
- If you want a deeper flavor, add 1/4 tsp extra almond extract.
- If you're short on time, use ready-made chilled pastry.
- If your cherries are very tart, add 2 extra tbsp of sugar.
Storage and Reheating
An Easy Homemade Cherry Pie leftovers can stay in the fridge for about 4-5 days. Keep it covered tightly with foil or a plastic dome to stop the crust from absorbing fridge smells.
If you want to freeze it, you can freeze the pie unbaked. Just wrap the crust and filling in double layers of foil and plastic wrap. When you're ready to eat, let it thaw in the fridge overnight and then bake it as usual, adding about 10-15 minutes to the time.
To reheat a slice, avoid the microwave if you want to keep the crust crispy. Put it in a 350°F (175°C) oven for about 10 minutes. This brings back the buttery crunch without making the cherries mushy.
What to Serve With
This is a rich dessert, so it pairs best with something creamy or cold to cut through the sweetness. A scoop of homemade vanilla ice cream is the classic choice for a reason. The cold cream melts into the warm, tart cherries for a lush combination.
If you're serving this at a party, a dollop of unsweetened whipped cream with a pinch of cinnamon on top works wonders. It adds a light, airy texture that balances the dense filling of the Easy Homemade Cherry Pie treat.
For a more sophisticated pairing, try a glass of cold sparkling cider or a tart dessert wine. The acidity in the drink complements the brightness of the cherries.
Right then, you've got everything you need to get this in the oven. The Easy Homemade Cherry Pie result is always worth the effort, especially when you see that first slice hold its shape on the plate.
Just remember to keep your butter cold and your patience high, and you'll have a stunning Easy Homemade Cherry Pie recipe to call your own.
Recipe FAQs
How to make a quick cherry pie?
Combine cherries, sugar, cornstarch, lemon juice, vanilla, almond extract, and cinnamon in a saucepan. Heat over medium for 5 8 minutes, fill a chilled crust, and bake for 60 minutes until the crust is mahogany colored.
What is the simplest pie to make?
This cherry pie is an excellent choice for beginners. If you enjoyed the ease of this prep, check out our simple chocolate sheet cake for another quick dessert.
Should I prebake crust for cherry pie?
No, do not prebake. The 60-minute bake time and thickened filling ensure the bottom crust cooks through without becoming soggy.
Is it true that frozen cherries are better than canned for pie?
No, this is a common misconception. Pitted cherries work well regardless of form as long as they are heated with cornstarch to thicken the juices before baking.
How to prevent the pie crust from becoming sticky?
Return the dough to the fridge for 10 minutes. Keeping the butter chilled prevents the pastry from becoming tacky and ensures flaky layers.
How to store leftover cherry pie?
Cover the pie tightly with foil or a plastic dome. Store it in the fridge for 4-5 days to prevent the crust from absorbing other odors.
How to reheat a slice of pie?
Place the slice in a 350°F oven. Avoid using the microwave to maintain a crispy crust.
Easy Homemade Cherry Pie