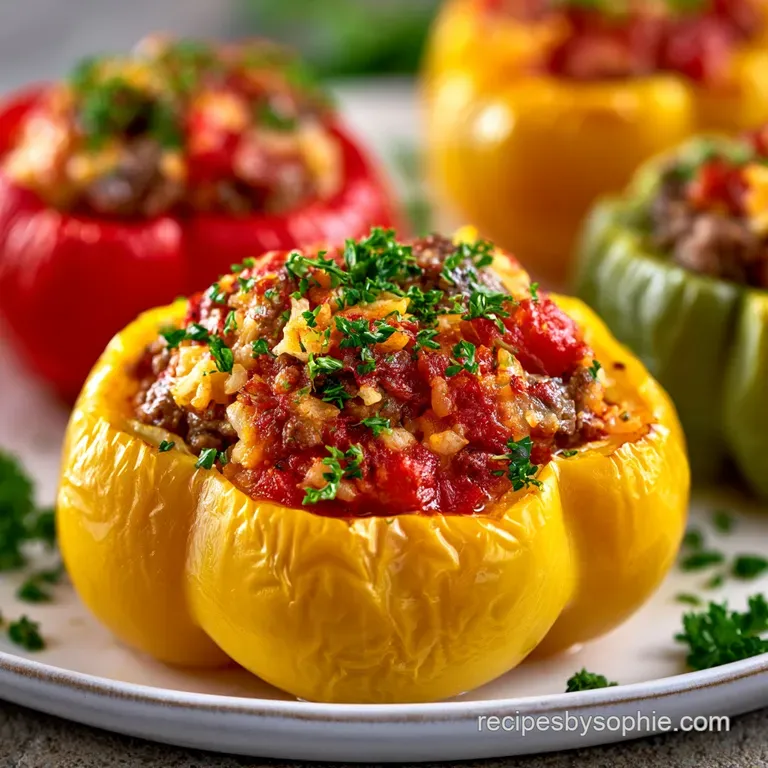
Stuffed Peppers: Ultimate Ground Beef Version
- Time: 15 min active + 70 min baking = Total 85 min
- Flavor/Texture Hook: Savory beef with a bubbly, golden cheese crust
- Perfect for: Hearty weeknight dinners and easy meal prep
The sound of ground beef hitting a hot skillet is one of my favorite noises in the kitchen. That aggressive sizzle means flavor is happening. But for a long time, I had a real problem with my version of this dish.
I'd stuff the peppers and pop them in the oven, only to find the peppers were still raw and crunchy, while the meat inside had turned into a dry, crumbly brick. It was a disaster every single time.
I realized I was treating the peppers like bowls instead of vegetables that actually need to cook. The fix was surprisingly simple. By adding a layer of sauce to the bottom of the pan, I created a steam chamber. This softens the pepper walls from the bottom up while the oven heat handles the top.
Now, the results are consistently tender crisp, and the filling stays velvety and moist.
You can expect a meal that feels like a hug in a bowl. We're talking about a rich, savory filling that blends with the sweetness of the bell pepper. These Stuffed Peppers are a fantastic way to get your veggies in without feeling like you're eating a salad.
Right then, let's get into how we actually make this happen without the sogginess.
The Best Ground Beef Stuffed Peppers
Making a great version of this dish is all about the balance of moisture. If you use raw rice, you're fighting a losing battle because the rice will suck every bit of juice out of the meat, leaving you with a dry center.
By using pre cooked rice, we're just letting it soak up the savory flavors of the beef and tomato sauce. It's a small change, but it's the difference between a meal you love and one you struggle to swallow.
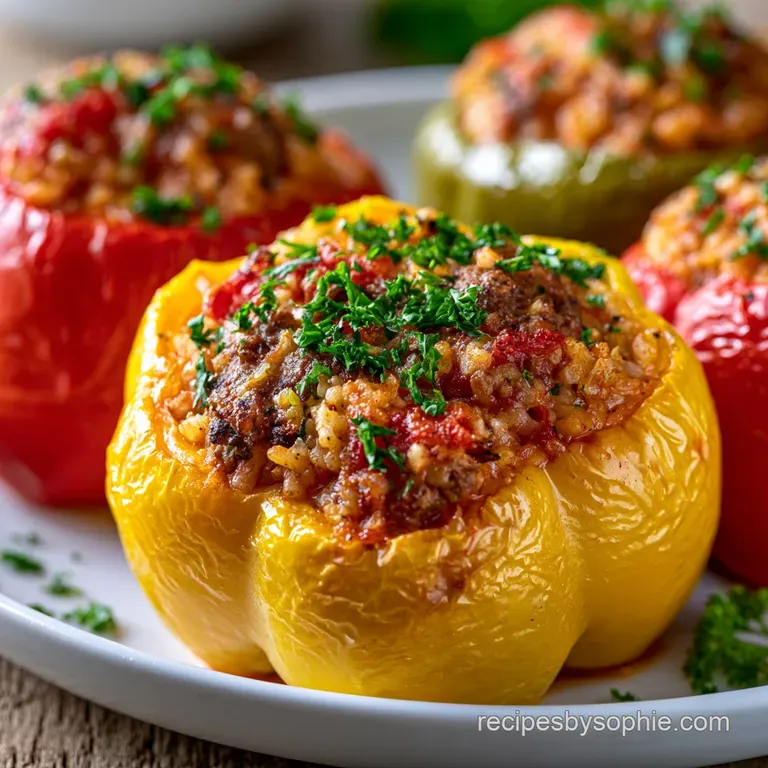
I've found that the choice of pepper matters more than you'd think. Red, orange, and yellow peppers are generally sweeter and have thinner walls, meaning they cook a bit faster. Green peppers have a more bitter, "grassy" taste and thicker walls.
I usually go for a mix of colors because it looks great on the table, and the flavor profile becomes more complex.
Trust me on this: don't skimp on the cheese. Whether you go for mozzarella for that classic pull or a sharp cheddar for a bit more bite, that top layer acts as a seal. It keeps the steam inside the pepper and gives you those crispy, brown edges that everyone fights over. It's the crowning glory of the whole process.
Why These Turn Out Great
I've spent a lot of time wondering why some versions of this dish fail, and it usually comes down to a few basic principles. Here is what's actually happening in the pan:
- Bottom Up Steaming: The tomato sauce in the baking dish creates a humid environment, which softens the pepper walls without making them mushy.
- Starch Absorption: Pre cooked rice acts as a sponge, absorbing the beef fat and tomato acidity to create a cohesive filling.
- The Cheese Cap: A layer of melted fat and protein seals the top, preventing the meat from drying out during the long bake.
- Thermal Mass: Using large peppers provides enough structure to hold a significant amount of filling without collapsing under the heat.
| Method | Time | Texture | Best For |
|---|---|---|---|
| Oven Baked | 70 min | Tender & Bubbly | Large batches / Family dinner |
| Stovetop | 40 min | Softer & Stewed | Quick meals / Smaller portions |
The Component Breakdown
It's helpful to understand what each part of the recipe is doing. I'm not talking about chemistry, just the practical side of how these ingredients behave when they hit the heat.
| Ingredient | Role | Pro Secret |
|---|---|---|
| Bell Peppers | The Vessel | Slice the bottom flat so they don't tip over |
| Ground Beef | The Base | Brown deeply for a richer, savory flavor |
| Cooked Rice | The Binder | Use day old rice for a better texture |
| Tomato Sauce | The Moisturizer | Acts as both a binder and a steaming agent |
Ingredients and Swaps
For this recipe, I use a combination of staples that you probably already have. I’ve always liked the way home cooks approach classics, similar to the vibes in a Once Upon a Chef cookbook review where the focus is on what actually works in a real kitchen.
- 6 large bell peppers (approx. 900g) Why this? Large ones hold more filling and stay juicy
- 450g ground beef Why this? High fat content keeps the filling moist
- 300g cooked white rice Why this? Absorbs the sauce without overcooking
- 1 small onion, diced (approx. 75g)
- 3 cloves garlic, minced (approx. 15g)
- 425g tomato sauce Why this? Provides the necessary acidity and steam
- 5g dried oregano
- 5g salt
- 2.5g black pepper
- 170g shredded mozzarella or cheddar cheese
- 60ml fresh parsley, chopped
| Original Ingredient | Substitute | Why It Works |
|---|---|---|
| Ground Beef (450g) | Ground Turkey (450g) | Leaner protein. Note: Lacks beefy depth, add 1 tsp Worcestershire |
| White Rice (300g) | Quinoa (300g) | Nuttier taste and more protein. Note: Slightly grainier texture |
| Mozzarella (170g) | Monterey Jack (170g) | Melts very smoothly. Note: Milder flavor than sharp cheddar |
| Tomato Sauce (425g) | Crushed Tomatoes (425g) | Thicker consistency. Note: Adds a chunkier, rustic feel |
Right then, before we move on, a quick decision shortcut for you: If you want a smoky vibe, add a teaspoon of paprika to the beef; if you want it spicier, toss in some red pepper flakes; if you're in a rush, microwave the peppers for 3 mins before stuffing.
Gear You'll Actually Need
You don't need a fancy kitchen to pull this off, but a few specific tools make it a lot easier. I use a heavy bottomed skillet for the beef because it distributes heat evenly and prevents the meat from sticking or scorching in one spot.
A 9x13 inch baking dish is non negotiable. You need enough room for the peppers to sit comfortably without being crammed together, which allows the heat to circulate. If they're too tight, the sides won't cook evenly.
Finally, a sharp chef's knife is key for those peppers. You want clean cuts on the tops and a very precise slice off the bottom to create a stable base. There's nothing more frustrating than a pepper tipping over mid bake and spilling its filling into the sauce.
Step-by-step Cooking Flow
Let's get into the flow. We'll start with the prep, move to the filling, and finish with the bake.
1. Prepping the Peppers
Slice the tops off the peppers and remove the seeds and membranes. Slice a thin sliver off the bottom of each pepper to create a flat base. Note: This prevents the "topple effect" in the oven.
2. Searing the Filling
In a skillet over medium high heat, brown the ground beef and diced onion until the meat is no longer pink and onions are translucent.
3. Adding the Aromatics
Stir in minced garlic and cook for 1 minute. Note: Don't let the garlic burn, or it'll turn bitter.
4. Mixing the Base
Add cooked rice, half of the tomato sauce, oregano, salt, and pepper; stir until evenly coated. Until the mixture looks glossy and cohesive.
5. Setting the Stage
Preheat oven to 350°F (175°C). Pour the remaining tomato sauce into the bottom of a 9x13 inch baking dish.
6. The Assembly
Stuff each pepper generously with the beef mixture, pressing down slightly, and place them in the baking dish.
7. The First Bake
Bake for 45-50 minutes until peppers are tender crisp.
8. The Cheesy Finish
Top with shredded cheese and bake for another 5-10 minutes until cheese is bubbly and golden. Garnish with fresh parsley.
Fixing Common Cooking Glitches
Even with a plan, things can go sideways. Usually, it's a matter of heat or moisture.
Peppers Are Still Too Hard
If your peppers are still crunchy after the first bake, it's usually because the walls were too thick or the oven temp was slightly off. You can tent the pan with foil to trap more steam and bake for another 10 minutes.
Filling Is Dry or Crumbly
This happens if the rice was overcooked before going in or if you used an ultra lean meat. Next time, add an extra splash of tomato sauce or a tablespoon of beef broth to the mix.
Peppers Tipping Over
This is a classic mistake. If they tip, the filling leaks. Always ensure that bottom slice is perfectly flat. If one tips, just gently nudge it back up with a spoon.
| Problem | Root Cause | Solution |
|---|---|---|
| Soggy Bottoms | Too much sauce in pan | Use 1/2 cup less sauce in the base |
| Burnt Cheese | Oven rack too high | Move rack to the center position |
| Bland Filling | Under seasoned beef | Add a pinch more salt/oregano before stuffing |
Success Checklist:
- ✓ Peppers have a flat base to stand upright.
- ✓ Beef is browned deeply before adding rice.
- ✓ Rice is pre cooked and not raw.
- ✓ Sauce is poured in the dish before adding peppers.
- ✓ Cheese is added only in the last 10 minutes.
Different Ways to Stuff
If you want to switch things up, there are a few ways to adapt this Stuffed Peppers recipe.
Vegetarian Stuffed Peppers: Swap the beef for a mix of cooked lentils and sautéed mushrooms. The mushrooms provide that same savory, "meaty" depth. Use a bit more oregano to keep the flavor bold.
Air Fryer Stuffed Peppers: This is a great way to speed things up. Set the air fryer to 350°F (175°C) and cook for about 20-25 minutes. Note that you'll need a small baking pan that fits inside the basket to hold the sauce.
Stuffed Peppers Without Rice: For those avoiding grains, swap the rice for riced cauliflower. Just sauté the cauliflower rice with the beef for a few minutes to cook off the excess moisture.
Ground Turkey Twist: Using turkey makes the dish lighter. Since turkey is leaner, I recommend adding a tablespoon of olive oil or butter to the skillet to prevent the filling from becoming dry.
Regarding scaling, if you're making a half batch, use a smaller 8x8 pan and reduce the baking time by about 20%. If you're doubling it, don't double the salt and spices exactly - go for about 1.5x the seasonings to avoid over salting. Work in batches if your skillet is too small to brown the meat properly.
Storage and Scrap Tips
These Stuffed Peppers hold up surprisingly well in the fridge. Store them in an airtight container for up to 4 days. When reheating, I suggest adding a tiny splash of water to the bottom of the dish and covering it with foil to keep the moisture in.
For freezing, you can freeze them before the cheese is added. Once cooled, wrap them individually in foil and freeze for up to 3 months. Thaw in the fridge overnight before baking at 350°F (175°C) for about 30 minutes.
As for zero waste, don't throw away those pepper tops! Chop them up and toss them into a freezer bag with other veggie scraps (onion ends, carrot peels). Once the bag is full, simmer them in water to make a quick vegetable stock.
Plating and Serving Guide
When you pull the pan out of the oven, let the Stuffed Peppers rest for about 5 minutes. This allows the filling to set so it doesn't fall apart when you lift the pepper out.
I love serving these with a side of crusty sourdough bread to soak up that leftover tomato sauce from the bottom of the pan. A simple side salad with a sharp lemon vinaigrette also cuts through the richness of the beef and cheese.
For a little extra punch, drizzle some fresh pesto or a squeeze of lime over the top right before serving. It adds a hit of brightness that makes the whole dish pop. Now, grab a fork and dive in while that cheese is still stretchy!
Recipe FAQs
What do you fill stuffed peppers with?
A mixture of ground beef, cooked white rice, and aromatics. Combine browned beef and onion with garlic, tomato sauce, oregano, salt, and pepper.
Should peppers be cooked before stuffing?
No, use them raw. Simply slice off the tops and a sliver of the bottom to create a stable base before filling and baking.
How to cook stuffed peppers in an oven?
Preheat your oven to 350°F (175°C). Place stuffed peppers in a dish with tomato sauce and bake for 45-50 minutes, then top with cheese and bake for another 5-10 minutes.
What are some common mistakes when making stuffed peppers?
Forgetting to flatten the base. If you don't slice a thin sliver off the bottom of each pepper, they will tip over in the baking dish.
How to brown the meat for the filling?
Sauté ground beef and diced onion over medium high heat. Cook until the meat is no longer pink and the onions become translucent before adding garlic.
How to store and reheat leftover stuffed peppers?
Keep them in an airtight container for up to 4 days. Add a splash of water to the dish and cover with foil when reheating to maintain moisture.
How to freeze stuffed peppers for later?
Wrap cooled peppers individually in foil before adding the cheese. Freeze for up to 3 months, then thaw overnight and bake at 350°F (175°C) for 30 minutes.
Stuffed Peppers With Ground Beef

