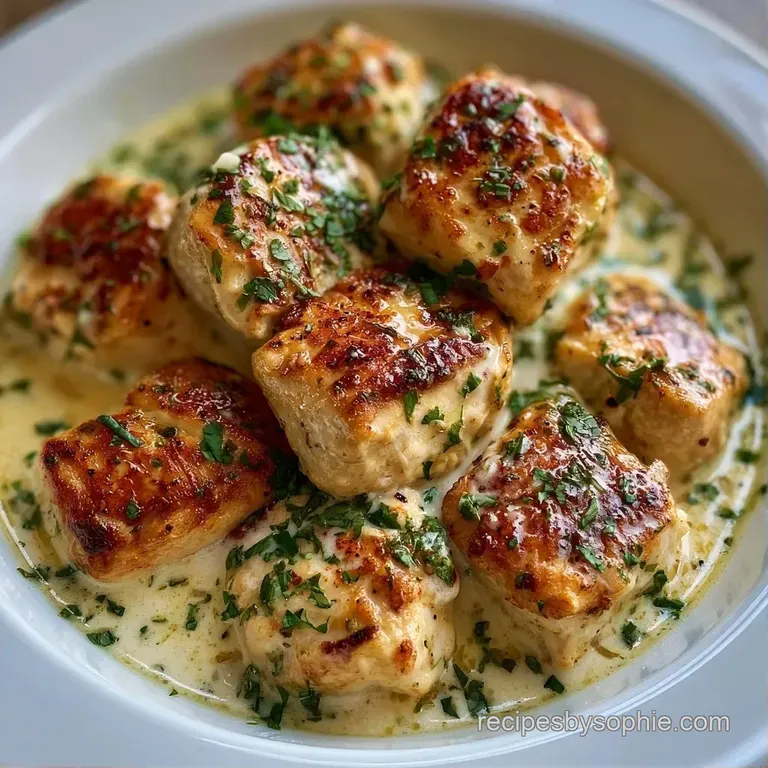
Creamy Garlic Chicken Broth: Rich and Velvety

- Time:10 minutes active + 20 minutes cooking = 30 minutes total
- Flavor/Texture Hook: Silky, garlic forward, and velvety
- Perfect for: Weeknight comfort dinners or a low carb meal prep
- Creamy Garlic Chicken Broth
- Why This Sauce Works
- Component Analysis
- Gathering Your Essential Ingredients
- Tools You Will Need
- The Complete Cooking Process
- Solving Common Cooking Problems
- Fun Flavor Variations
- Adjusting the Portion Size
- Debunking Kitchen Myths
- Storage and Zero Waste
- Serving and Presentation Tips
- Recipe FAQs
- 📝 Recipe Card
The sound of chicken hitting a hot pan is basically my favorite song. That aggressive sizzle tells me everything I need to know, and once those golden brown edges form, I know the flavor is locked in.
I remember making this on a rainy Tuesday when I had absolutely nothing in the fridge but a few chicken breasts and some garlic. I wanted something that felt like a hug in a bowl, but I didn't have the energy for a three hour simmer.
That's how this specific method came about. It's not a traditional slow cooked broth, but a fast, high impact sauce that tastes like it took all day. The goal here is a Creamy Garlic Chicken Broth that's rich enough to coat a spoon but bright enough to keep you coming back for another bite. You'll get that deep, savory chicken taste mixed with a buttery garlic punch that just hits different.
Creamy Garlic Chicken Broth
Right then, let's get into why this actually works. Most people just toss everything in a pot and hope for the best, but that leads to a bland, watery mess. We're doing things differently by building layers of flavor, starting with the sear and ending with a bright acidic finish.
Why This Sauce Works
- The Brown Bits: Searing the chicken first creates a layer of flavor on the pan called fond, which gives the broth a deep, savory base.
- Fat Integration: Melting butter with garlic and shallots creates a flavor carrier that distributes the aromatics evenly throughout the cream.
- Liquid Reduction: Simmering the broth before adding cream concentrates the chicken flavor, so the sauce doesn't taste watered down.
- Acid Balance: A splash of lemon juice at the end cuts through the heavy fat of the cream and butter, brightening the whole dish.
| Method | Time | Texture | Best For |
|---|---|---|---|
| Stovetop (This Recipe) | 30 minutes | Velvety & Thick | Fast weeknights |
| Oven Braised | 1 hour 30 mins | Shredded & Rich | Sunday dinner |
| Slow Cooker | 6 hours | Fall apart tender | Set and forget meals |
Component Analysis
| Ingredient | Science Role | Pro Secret |
|---|---|---|
| Heavy Cream | Thickener | Use room temp to prevent splitting |
| Lemon Juice | Acidifier | Add at the very end to keep it bright |
| Garlic | Aromatic | Mince finely for a more uniform taste |
| Unsalted Butter | Emulsifier | Use a large knob for a glossy finish |
Gathering Your Essential Ingredients
For this recipe, you'll want ingredients that provide a balance of richness and sharpness. I honestly don't even bother with low-fat cream here, as you'll lose that silky mouthfeel that makes the dish.
- 1 lb (450g) boneless skinless chicken breast, cubed Why this? Quick cooking time and absorbs sauce well
- 1 tsp (5g) salt Why this? Basic flavor enhancer
- ½ tsp (3g) black pepper Why this? Adds a subtle woody heat
- 1 tbsp (15ml) olive oil Why this? High smoke point for searing
- 4 tbsp (60g) unsalted butter Why this? Adds richness and a nutty aroma
- 6 cloves (18g) garlic, minced Why this? The heart of the flavor profile
- 1 small (110g) shallot, finely diced Why this? Milder and sweeter than regular onions
- 2 cups (480ml) low sodium chicken broth Why this? Base liquid for the sauce
- 1 cup (240ml) heavy cream Why this? Creates the velvety texture
- 1 tsp (2g) dried thyme Why this? Earthy herb note that pairs with garlic
- ½ tsp (2g) onion powder Why this? Adds a concentrated savory depth
- 1 tbsp (15ml) lemon juice Why this? Essential for cutting through the fat
| Original Ingredient | Substitute | Why It Works |
|---|---|---|
| Heavy Cream (1 cup) | Full fat Coconut Milk (1 cup) | Similar fat content. Note: Adds tropical notes |
| Shallot (1 small) | Red Onion (2 tbsp, minced) | Similar flavor. Note: Slightly sharper taste |
| Chicken Broth (2 cups) | Vegetable Broth (2 cups) | Same liquid ratio. Note: Less savory depth |
| Dried Thyme (1 tsp) | Dried Oregano (1 tsp) | Similar herb family. Note: More "pizza like" flavor |
Tools You Will Need
You don't need a fancy kitchen for this, but a few specific tools make it way easier. A wide skillet is my go to because it allows for more surface area during the sear, which means more brown bits for the sauce.
I recommend a stainless steel or cast iron skillet if you have one. Non stick is okay, but you won't get as much of that flavorful crust on the chicken. You'll also need a sturdy whisk or wooden spoon to scrape the pan, and a set of tongs for flipping the meat.
The Complete Cooking Process
Let's crack on. This is where the magic happens. To get the best results, I follow a strict flow: sear, aromatic build, reduce, and finish. Following Food Network's quick cooking tips, keeping your ingredients prepped (mise en place) is the only way to ensure you don't burn the garlic while hunting for the thyme.
1. The Protein Sear
Pat the chicken cubes dry with a paper towel, season with salt and pepper, and sear in olive oil over medium high heat until golden brown on all sides. Note: Dry chicken sears better and doesn't steam. Once browned, remove the chicken from the pan and set it aside on a plate.
2. Developing the Aromatics
Lower the heat to medium and melt the butter. Add the diced shallots and minced garlic, sautéing for 1-2 minutes until they are fragrant and translucent. Note: Don't let the garlic turn dark brown, or it will taste bitter.
3. Deglazing the Pan
Pour in the chicken broth, scraping the bottom of the pan with your spoon to release all the brown bits. Stir in the dried thyme and onion powder. Let it simmer for 4-5 minutes until the liquid reduces by about one third.
4. Creating the Creamy Finish
Stir in the heavy cream and lemon juice. Lower the heat to a gentle simmer. Return the seared chicken and any juices from the plate back into the pan. Simmer for another 3-5 minutes until the sauce is velvety and the chicken is fully cooked through.
Chef Note: If the sauce looks too thick, add a tablespoon of water or extra broth. If it's too thin, let it simmer for another 2 minutes without a lid.
Solving Common Cooking Problems
Even for experienced cooks, sauces can be finicky. The most common issue I see is the sauce splitting or the garlic burning. If you're struggling with the chicken texture, remember that the sear is just for flavor; the final simmer is where it actually finishes cooking. Getting the chicken texture right is key, similar to how I handle my Chicken Recipe for 4.
Why Sauce is Thin
If your broth hasn't thickened, it's usually because the reduction step was skipped or rushed. The liquid needs to evaporate to concentrate the flavors and the fat.
Handling Curdled Cream
This happens if the heat is too high when the cream is added or if the lemon juice is added too early. Always lower the heat before stirring in the dairy.
Saving Burnt Garlic
Once garlic burns, the bitterness is permanent. There is no "fixing" burnt garlic; you have to wipe the pan and start the aromatic step over.
| Problem | Root Cause | Solution |
|---|---|---|
| Grainy Sauce | Heat too high | Lower heat and whisk in a splash of broth |
| Bitter Taste | Overcooked garlic | Start aromatics over in fresh butter |
| Bland Flavor | Not enough salt | Add a pinch more salt and extra lemon juice |
Common Mistakes Checklist
- ✓ Patting chicken dry before searing
- ✓ Using room temperature cream
- ✓ Reducing broth before adding cream
- ✓ Adding lemon juice at the very end
- ✓ Sautéing garlic only until translucent
Fun Flavor Variations
This Creamy Garlic Chicken Broth is a great base, but you can easily pivot it. If you want a meal that's more of a sear and less of a broth, my Pan Seared Garlic Chicken is a great shout.
Adding an Italian Twist
Swap the thyme for dried oregano and add a handful of fresh spinach at the very end. Stir in some grated Parmesan cheese for a thicker, saltier finish that feels like a restaurant dish.
Making it Keto Friendly
This recipe is already quite low carb, but you can make it strictly keto by omitting the shallots and using a bit more garlic. Serve it over steamed cauliflower instead of pasta.
Brightening the Profile
For a zingier version, double the lemon juice and add a teaspoon of Dijon mustard during the deglazing step. This creates a "piccata" style vibe that's incredibly refreshing.
Adjusting the Portion Size
If you're cooking for just yourself or a crowd, you can't just multiply everything linearly. Spices and fats behave differently in larger volumes.
Scaling Down (Half Batch): Use a smaller skillet to prevent the broth from evaporating too quickly. Reduce the cooking time for the reduction step by about 20%, as a smaller amount of liquid boils off faster.
Scaling Up (Double Batch): Do not double the salt or thyme immediately; start with 1.5x and taste as you go. I strongly suggest searing the chicken in batches. If you crowd the pan, the chicken will release moisture and boil rather than sear, and you'll lose that golden crust.
Decision Shortcut: If you want a thicker sauce → Simmer for 2 extra minutes. If you want it more citrusy → Add a pinch of lemon zest. If you want it heartier → Stir in sliced mushrooms with the shallots.
Debunking Kitchen Myths
I've heard a lot of "rules" that just aren't true. Let's clear a few up.
First, the idea that searing meat "seals in the juices." It doesn't. The meat loses moisture regardless of whether you sear it. The sear is entirely about the flavor and the brown crust.
Second, some people say you have to crush garlic to release the flavor. While crushing does release more allicin, finely mincing it is better for this recipe because you get consistent bits of garlic throughout the sauce rather than one giant pungent chunk.
Storage and Zero Waste
This dish is great for meal prep, but you have to be careful with the cream when reheating.
Refrigeration: Store leftovers in an airtight container for up to 3 days in the fridge. The sauce will thicken significantly as it cools.
Freezer Instructions: I don't recommend freezing this specific recipe. The heavy cream tends to separate and become grainy when thawed, which ruins the velvety texture.
Reheating Pro Tip: Reheat on the stove over low heat. Add a splash of water or chicken broth to loosen the sauce back up. Do not boil it, or the cream might split.
Zero Waste: Don't toss those chicken scraps. If you have leftover shallot ends or garlic skins, toss them into a freezer bag with other veggie scraps to make a homemade stock for your next batch of broth.
Serving and Presentation Tips
To make this look as good as it tastes, don't just dump it in a bowl. I love serving this over a bed of wide egg noodles or mashed potatoes to soak up every drop of the sauce.
For a pop of color, garnish with freshly chopped parsley or chives. The green contrast against the creamy white sauce makes it look professional. If you're serving it as a soup, a side of toasted sourdough bread rubbed with a raw garlic clove is the perfect companion.
Finally, serve it in a shallow bowl. This keeps the chicken from sinking and lets the velvetiness of the broth take center stage. Trust me on this, the presentation changes the whole experience.
Recipe FAQs
How to make a creamy garlic chicken sauce?
Sear chicken cubes in olive oil, then sauté shallots and garlic in butter. Deglaze the pan with chicken broth, simmer to reduce, and stir in heavy cream and lemon juice until velvety.
Should you put garlic in chicken broth?
Yes, it adds essential depth. Sautéing minced garlic in butter before adding the broth creates a fragrant base that elevates the entire sauce.
How to cook keto chicken with a creamy garlic sauce?
Follow the official recipe exactly. All listed ingredients, including the heavy cream and butter, are naturally low-carb and suitable for a keto diet.
How to make a garlic butter chicken recipe?
Melt butter over medium heat and sauté minced garlic and shallots. Use this aromatic base to build the sauce before adding chicken broth and finishing with cream.
Can I freeze this creamy garlic chicken?
No, it is not recommended. The heavy cream tends to separate and become grainy upon thawing, which destroys the velvety texture.
How to reheat the leftovers?
Warm on the stove over low heat. Add a splash of water or chicken broth to loosen the thickened sauce, but do not let it boil.
Is it true that this sauce stays thin after refrigeration?
No, this is a common misconception. The sauce will thicken significantly as it cools in the refrigerator.
Creamy Garlic Chicken Broth

